Categories
Manuals

t6 thermostat installation manual

Welcome to the Honeywell Home T6 Pro Programmable Thermostat installation guide. This manual provides step-by-step instructions for installing and configuring your new thermostat efficiently and safely.

Package Contents

The Honeywell Home T6 Pro Programmable Thermostat package includes the thermostat, UWP mounting system, decorative cover plate, screws, 2 AA batteries, and thermostat literature.

2.1. T6 Pro Thermostat

The Honeywell Home T6 Pro Thermostat is a programmable device designed to regulate your home’s temperature efficiently. It features a sleek, modern design and intuitive controls, allowing for easy scheduling and temperature adjustments; The thermostat is compatible with various heating and cooling systems, including forced air, hydronics, and heat pumps. Its advanced features include adaptive intelligent recovery, which learns your system’s performance to ensure optimal comfort. Additionally, it supports stages of heating and cooling for precise temperature control. The T6 Pro also integrates seamlessly with smart home systems, enhancing convenience and energy efficiency.

2.2. UWP Mounting System

The UWP Mounting System is a versatile and secure installation solution for the Honeywell Home T6 Pro Thermostat. It ensures a straightforward mounting process, allowing the thermostat to be effortlessly attached to any wall or electrical junction box. The UWP system includes all necessary hardware and adapters, providing compatibility with various mounting scenarios. Its robust design guarantees stability and durability, while its adaptability makes it suitable for both new installations and upgrades from older thermostat models, ensuring a seamless fit every time.

2.3. Decorative Cover Plate

The Decorative Cover Plate enhances the aesthetic appeal of your Honeywell Home T6 Pro Thermostat installation. Designed to cover paint gaps left by older thermostats, it ensures a seamless transition. Available in various sizes, including a square cover plate or smaller options like 4-49/64 inches, it fits securely over the mounting system. The cover plate is easy to install and adds a polished finish to your wall, maintaining a clean and modern look in any room.

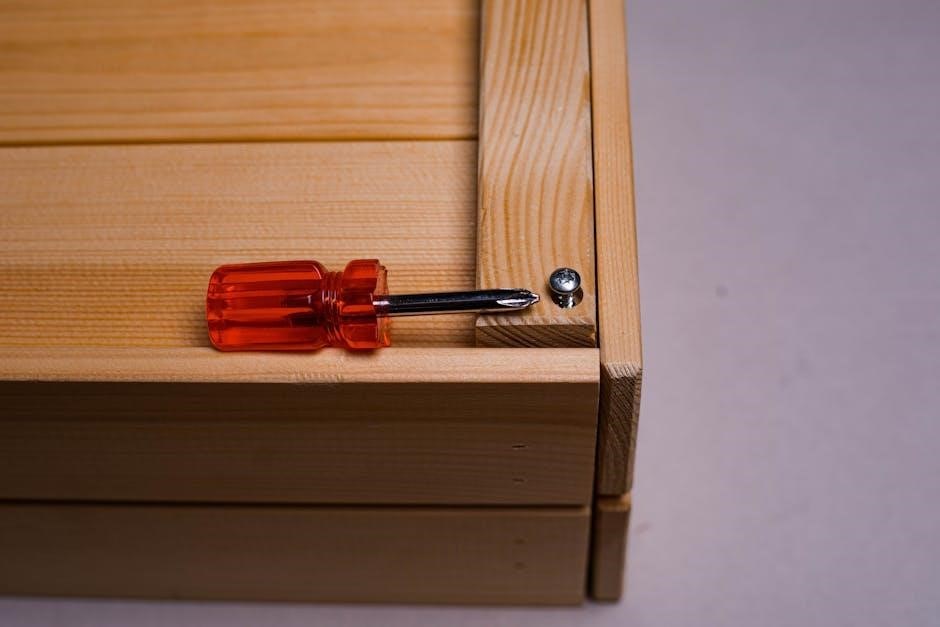
2.4. Screws and Anchors

The Honeywell Home T6 Pro Thermostat package includes high-quality screws and wall anchors to ensure secure installation. These components are designed to fit standard drywall or plaster walls, providing a sturdy base for your thermostat and UWP Mounting System. The screws are durable and resistant to stripping, while the anchors distribute weight evenly to prevent damage. Proper use of these hardware pieces guarantees a reliable and lasting installation, maintaining the thermostat’s functionality and appearance over time.

2.5. 2 AA Batteries

The Honeywell Home T6 Pro Thermostat requires 2 AA alkaline batteries for operation, which are included in the package. These batteries provide power to the thermostat, ensuring proper functionality. To install, insert the batteries into the thermostat’s battery compartment, following the polarity indicators. Properly seated batteries are essential for reliable performance. Replace them when the battery level indicator appears low to maintain uninterrupted operation. Always use high-quality alkaline batteries for optimal results and longevity of your thermostat. Dispose of used batteries responsibly.

2.6. Thermostat Literature

The thermostat literature provided includes detailed installation instructions, user guides, and troubleshooting tips. This comprehensive documentation ensures a smooth setup process and helps resolve common issues quickly. Refer to the manual for step-by-step guidance on wiring, system compatibility, and advanced settings. The literature also covers maintenance tips, such as battery replacement and software updates, to keep your Honeywell Home T6 Pro Thermostat functioning optimally. Always keep the manual handy for easy reference during installation or operation.

Installation Instructions

Follow the step-by-step guide to install your Honeywell Home T6 Pro Thermostat safely and efficiently. Ensure power is disconnected before starting the installation process.

3.1. Optional Cover Plate Installation

The optional cover plate is designed to cover paint gaps from your old thermostat or mount the device to an electrical junction box. To install, align the cover plate with the UWP mounting system and secure it using the provided screws. Ensure the plate is flush against the wall for a seamless appearance. This feature enhances the thermostat’s aesthetic integration with your home decor while providing a sturdy mounting solution. Refer to the manual for specific sizing and compatibility details.

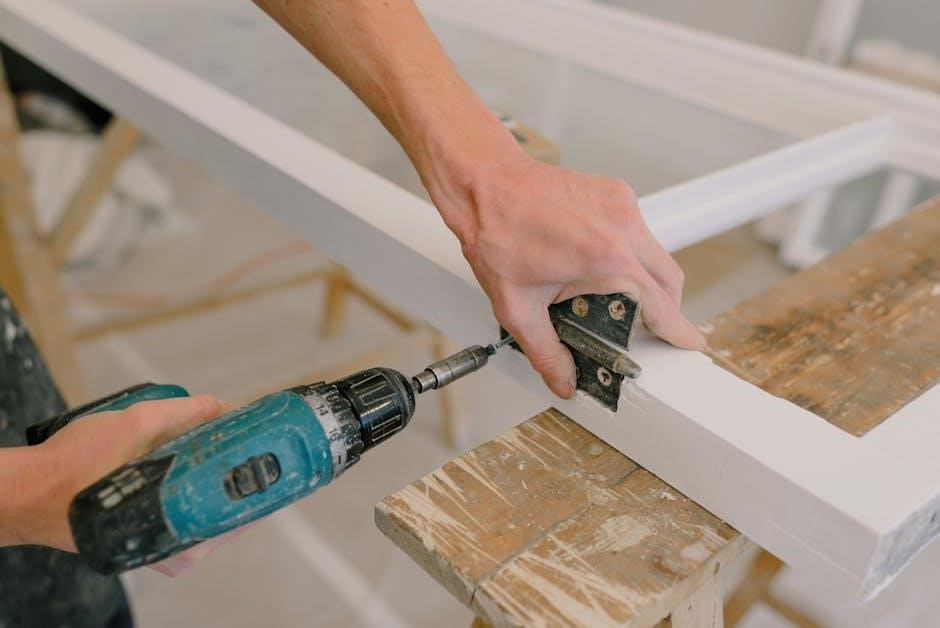
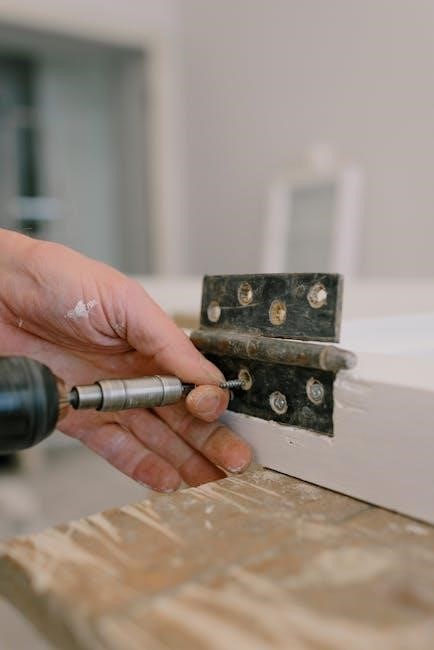
3.2. UWP Mounting System Installation

The UWP Mounting System provides a secure and damage-free installation method. Start by aligning the baseplate with the wall, ensuring it is level. Mark the screw locations, then drill pilot holes if necessary. Secure the mounting system using the provided screws and anchors. No additional support is needed for the thermostat. Once installed, attach the thermostat to the UWP Mounting System by aligning the tabs and gently pushing until it clicks into place. This system ensures a stable and efficient installation process. Always follow safety guidelines to avoid damage to the device or surrounding area.

3.3. Wiring Terminal Designations

Proper wiring is essential for the T6 Pro Thermostat’s functionality. The terminal designations are clearly labeled to ensure accurate connections. Commonly used terminals include R, W, Y, G, C, and O/B. Use 18- to 22-gauge thermostat wire for all connections. For heat-only systems, connect the R and W terminals. For heat pump systems, connect R, Y, W, and O/B. Ensure all wires are securely attached to their respective terminals to prevent loose connections. Refer to the system type and terminal diagram for specific wiring configurations to avoid errors during installation.

Wiring Conventional Systems

Connect the T6 Pro Thermostat using 18-22 gauge wires to terminals R, W, Y, G, and C for conventional systems, ensuring proper functionality for heating and cooling operations.

4.1. Forced Air Systems

For forced air systems, connect the R wire to the heating system’s power source. The W and Y wires link to the heating and cooling stages, while G controls the fan. Ensure all connections match your system’s configuration. Use 18-22 gauge thermostat wire for reliable performance. Verify terminal labels to avoid incorrect wiring, which could damage the system. Always refer to your HVAC system manual for specific wiring requirements and safety precautions.

4.2. Hydronics Systems

The T6 Pro is compatible with hydronics systems, which use water for heating. Connect the R wire to the power source and the W wire to the zone valve for heat activation. The Y wire controls cooling, if applicable. For systems with multiple zones, ensure proper wiring to avoid interference. Use 18-22 gauge thermostat wire for reliable connections. Always verify terminal designations and system compatibility before proceeding with installation. Ensure power is off during wiring to prevent electrical hazards.

Thermostat Mounting

Mount the T6 Pro securely to a wall or electrical junction box. Use the UWP system or optional cover plate for a seamless installation and professional finish. Ensure proper alignment and level positioning for accurate temperature sensing.

5.1. Mounting to an Electrical Junction Box

Mount the T6 Pro thermostat directly to an electrical junction box using the provided UWP Mounting System. Ensure the junction box is secure and meets local electrical codes. Attach the UWP system to the junction box using the included screws, ensuring a flush mount. Align the thermostat with the UWP system and gently press it into place until it clicks securely. Verify the thermostat is level for accurate temperature sensing. This method provides a sturdy and professional installation without additional adapters. Always turn off power before starting the installation.

5.2. Covering Paint Gaps from Old Thermostats

Use the optional decorative cover plate to cover paint gaps left by previous thermostats. This plate is included in the package and features a sleek design to blend seamlessly with your wall. For square cover plates, measure the area to ensure proper fitment. Secure the plate using the provided screws, ensuring it is flush with the wall. This solution maintains a clean appearance and prevents unsightly gaps from being visible after installation. The cover plate is compatible with various mounting systems, offering flexibility and convenience. Always install the cover plate before attaching the thermostat for the best results.

System Operation Settings

Configure your T6 Pro Thermostat to match your HVAC system type, including heat-only, heat pump, or dual fuel systems. Adjust settings for optimal performance and efficiency.

6.1. Heat-Only Systems

For heat-only systems, the T6 Pro Thermostat operates by controlling the heating equipment based on the set temperature. It supports single-stage heating systems and can be configured to work with fossil fuel kits or electric heat sources. The thermostat ensures efficient operation by learning your system’s response time, optimizing startup times to maintain comfort. Adaptive recovery and compressor protection features enhance performance, while compatibility with various heating types makes it versatile for different setups. Always refer to the wiring diagram for proper connections to avoid system issues.

6.2. Heat Pump Systems

The T6 Pro Thermostat supports 2H/2C and 3H/2C heat pump systems, ensuring compatibility with various configurations. For proper operation, ensure no wire is connected to the W terminal in UWP systems. The thermostat features adaptive recovery, optimizing temperature control by learning your system’s behavior. Compressor protection is enabled to prevent rapid cycling, safeguarding equipment. Configuration options include emergency heat sources and staging, tailored to your specific heat pump setup for efficient and reliable performance. Always verify wiring and settings to match your system requirements for optimal functionality;

6.3. Dual Fuel Systems

The T6 Pro Thermostat seamlessly integrates with dual fuel systems, combining gas furnaces with heat pumps for enhanced efficiency. It automatically switches between fuel sources based on temperature demands, optimizing comfort and energy savings. Adaptive recovery learns your system’s response, ensuring timely activation. Configuration options allow enabling or disabling backup heat sources, with settings accessible via the installer menu. Proper wiring and compatibility checks are essential to ensure smooth operation and prevent equipment damage. Always refer to system specifications for optimal setup and performance.

Installer System Test

Ensure the system operates correctly after installation. Verify compatibility, check wiring connections, and perform a power cycle test to confirm functionality and avoid potential issues.

7.1. System Compatibility Check

Verify the T6 Pro thermostat is compatible with your HVAC system. Ensure it supports your system type, such as forced air, hydronics, or heat pump configurations. Check if a C-wire is required for power. For heat pumps, confirm the correct wiring at the UWP terminal. Ensure the system operates within the thermostat’s temperature range (40°F to 90°F for heat, 50°F to 99°F for cool). Address any mismatches to prevent installation issues.

7.2. Wiring Verification

After installation, verify all wiring connections to ensure they match the terminal designations on the T6 Pro thermostat. Check that wires are securely attached to the correct terminals (R, W, Y, G, C, O). Use 18-22 gauge wires for connections. Ensure no wires are loose or mislabeled. For heat pump systems, verify no wire is attached to the W terminal on the UWP system. Confirm slider tabs for U terminals are correctly set. Finally, ensure the HVAC system is powered off during this process to avoid electrical hazards.

7.3. Power Cycle Test

After completing the wiring and system setup, perform a power cycle test. Turn off the power to the HVAC system at the circuit breaker. Wait 5 minutes to ensure the system is fully powered down. Restore power and check if the thermostat powers up correctly. Verify that the display lights up and all functions operate as expected. This test ensures proper system reset and prevents potential compressor damage from rapid cycling. Repeat if issues arise during initial startup.

Specifications

Physical Dimensions: 4-1/16″ H x 4-1/16″ W x 1-5/32″ D. Battery Requirements: 2 AA alkaline batteries. Compatibility: Works with most HVAC systems requiring 24VAC power (C wire needed).

8;1. Physical Dimensions

The Honeywell Home T6 Pro Thermostat measures 4-1/16 inches in height, 4-1/16 inches in width, and 1-5/32 inches in depth. In metric terms, this is approximately 103.5 mm (H) x 103.5 mm (W) x 29 mm (D). Its compact design ensures a sleek appearance while fitting standard electrical junction boxes. The thermostat’s lightweight construction and streamlined dimensions make it easy to install and integrate seamlessly with most home décors. These measurements ensure compatibility with existing mounting systems and cover plates for a professional finish.

8.2. Battery Requirements

The Honeywell Home T6 Pro Thermostat requires 2 AA alkaline batteries for operation, which are included in the package. To replace the batteries, turn off the thermostat, remove the old batteries, and insert fresh ones. Ensure the batteries are correctly oriented to maintain proper function. Avoid mixing old and new batteries. Replace batteries annually or when the low-battery indicator appears on the display. This ensures uninterrupted performance and maintains your programmed settings and schedules.

8.3. Compatibility Information

The Honeywell Home T6 Pro Thermostat is compatible with most heating, cooling, and heat pump systems. It requires a 24 VAC power supply (C wire) for operation. This thermostat does not support electric baseboard heat (120-240V) or millivolt systems. For optimal performance, it is designed to work with single-stage or multi-stage systems. Compatibility extends to Android and iOS devices for remote control via the app. Ensure your system meets these requirements before installation to guarantee proper functionality and avoid connectivity issues.

Troubleshooting

For issues, ensure power is on, batteries are fresh, and settings are correct. Check circuit breakers and verify system compatibility. Wait 5 minutes for system response.

9.1. Common Issues and Solutions

Common issues include the thermostat not turning on, incorrect temperature readings, or unresponsive controls. Ensure the power switch is on and batteries are fresh. Check for loose wiring connections and verify system compatibility. If the display is blank, reset the thermostat by removing batteries for 10 seconds. For temperature inaccuracies, calibrate the sensor in the settings menu. If issues persist, perform a factory reset by holding the menu button for 10 seconds while inserting batteries.

9.2. Error Codes and Resolutions

Common error codes on the T6 Pro include E1 (low battery), E2 (system malfunction), and E3 (sensor issue). For E1, replace the AA batteries. E2 may indicate faulty wiring or system incompatibility—check connections and ensure compatibility. E3 suggests a sensor calibration issue; reset the sensor in the settings menu. If errors persist, cycle power by removing batteries for 10 seconds and restarting. Refer to the troubleshooting section for detailed solutions or contact Honeywell support if unresolved.

9.3. Resetting the Thermostat

To reset the Honeywell T6 Pro, remove the AA batteries and press the “Reset” button located on the back of the thermostat. Hold it for 10 seconds to clear all settings. Reinstall the batteries and follow the setup instructions to restore functionality. This process resets temperature settings, schedules, and system configurations to factory defaults, ensuring a clean start without altering firmware updates or system compatibility.

Maintenance Tips

Regularly replace AA batteries, clean the thermostat display with a soft cloth, and check for software updates to ensure optimal performance and functionality.

10.1. Battery Replacement

To replace the batteries in your T6 Pro Thermostat, first ensure the system power is off. Gently pull the thermostat away from the wall to access the battery compartment. Remove the old AA batteries and insert two new alkaline AA batteries, ensuring proper alignment. Replace the thermostat and restore power. This simple process maintains functionality and prevents system disruptions.

10.2. Cleaning the Thermostat

Regularly clean your T6 Pro Thermostat to ensure optimal performance. Power down the system and remove the thermostat from the wall. Use a soft, dry cloth to gently wipe the screen and exterior surfaces. Avoid harsh chemicals or liquids, as they may damage the device. For stubborn marks, lightly dampen the cloth with water, but ensure it is not soaking wet. Cleaning helps maintain functionality and prevents dust buildup that could affect temperature sensing or touchscreen responsiveness.

10.3. Software Updates

Regular software updates ensure your T6 Pro Thermostat operates with the latest features and improvements. To update, open the Honeywell Home app and navigate to the thermostat settings. Select “Check for Updates” and follow the prompts to download and install the newest version. Ensure the thermostat remains powered during the update process. Enable auto-updates in the app for seamless future updates, keeping your system optimized for performance, security, and compatibility with your HVAC equipment.

The Honeywell Home T6 Pro Thermostat installation process ensures optimal performance and energy efficiency. By following the guidelines, you can enjoy precise temperature control and smart home integration. Regular maintenance, such as battery replacements and software updates, will keep your system running smoothly. If issues arise, refer to the troubleshooting section or contact Honeywell customer support for assistance. Proper installation and upkeep will maximize comfort and savings, making the T6 Pro a reliable choice for your home.

Categories
Manuals

power quick pot manual pdf

The Power Quick Pot Manual PDF is an essential guide for mastering your electric pressure cooker, covering safety, features, and troubleshooting for models Y4D-36, Y6D-36, Y8D-36, and Y10D-36.

Overview of the Power Quick Pot

The Power Quick Pot is a versatile electric pressure cooker designed to simplify cooking while enhancing flavor and efficiency. Available in models Y4D-36, Y6D-36, Y8D-36, and Y10D-36, it offers capacities suited for various household needs. This multi-functional cooker supports pressure cooking, slow cooking, sautéing, steaming, and more, making it a convenient addition to any kitchen. With advanced safety features and user-friendly controls, the Power Quick Pot ensures safe and efficient cooking. Its ability to cook up to 70% faster than traditional methods makes it ideal for busy households. The device also includes preset programs and customizable settings, allowing users to tailor cooking preferences. Built-in safety mechanisms, such as a locking lid, prevent accidental opening during operation, ensuring a secure cooking experience.

Importance of Reading the Manual

Reading the Power Quick Pot manual is crucial for safe and effective use of the appliance. It provides detailed instructions on operating the device, understanding its features, and troubleshooting common issues. The manual outlines essential safety precautions, such as avoiding outdoor use and ensuring the ceramic pot is properly placed. By following the guidelines, users can prevent accidents and extend the product’s lifespan. Additionally, the manual explains how to utilize preset programs and custom settings, enabling users to maximize the cooker’s multi-functional capabilities. It also covers maintenance tips, such as regular cleaning and proper storage, ensuring optimal performance. Referencing the manual helps users avoid errors and makes cooking with the Power Quick Pot a seamless experience.

Key Features of the Power Quick Pot

The Power Quick Pot boasts a variety of advanced features designed to enhance your cooking experience. It offers multiple cooking modes, including pressure cooking, slow cooking, sautéing, steaming, and sous vide. The cooker is equipped with a user-friendly interface, featuring essential buttons and controls for easy navigation. Preset programs allow for quick and convenient meal preparation, while custom settings provide flexibility for specific recipes. Built-in safety mechanisms ensure secure operation, preventing lid opening under pressure. The cooker also includes a delay start function, enabling users to schedule cooking up to 24 hours in advance. These features make the Power Quick Pot a versatile and efficient addition to any kitchen, suitable for a wide range of cooking needs and preferences.

Safety Precautions

Always follow safety guidelines: avoid opening the lid under pressure, use the ceramic pot, and keep children away. Never operate outdoors or with a damaged cord.

Before First Use

Before using your Power Quick Pot for the first time, carefully read the manual to understand its operation and safety features. Ensure all parts are clean and free from damage. Wash the inner pot and lid with warm soapy water, and dry thoroughly. Place the cooker on a stable, heat-resistant surface away from children. Plug in the power cord securely, ensuring it is not damaged. Familiarize yourself with the lid locking mechanism and pressure release switch. Always ensure the lid is properly sealed before cooking. Following these steps ensures a safe and effective first use of your Power Quick Pot.

During Cooking

During cooking, ensure the Power Quick Pot is placed on a heat-resistant surface and keep children away. Always use the recommended liquid levels to avoid scorching or damage. Monitor the pressure indicator; when it rises, the cooker is pressurized. Avoid opening the lid until pressure is naturally or quickly released. For safety, never force the lid open while pressure is present. Use the provided handles to avoid burns. If using the sauté function, stir food regularly to prevent sticking. Keep the power cord away from hot surfaces. Ensure the cooker is not left unattended during operation. Follow recipe guidelines for cooking times and settings to achieve optimal results. Adhere to these precautions to ensure safe and efficient cooking with your Power Quick Pot.

After Cooking

After cooking, allow the Power Quick Pot to cool slightly before handling. Always unplug the unit to ensure safety. For pressure release, wait until the pressure indicator drops, indicating it’s safe to open the lid. Never attempt to force the lid open while pressure is still present. Once cooking is complete, remove any leftovers and store them promptly. Clean the inner pot, lid, and sealing ring with warm, soapy water after each use to prevent residue buildup. Regular cleaning ensures optimal performance and hygiene. Avoid using abrasive cleaners or scourers to maintain the non-stick surfaces. Store the Power Quick Pot in a dry, cool place when not in use. Always refer to the manual for specific cleaning instructions to maintain your device’s longevity and functionality.

Quick Start Guide

The Quick Start Guide provides an easy 5-step process: open the lid, place the inner pot, add ingredients, lock the lid, and select a preset program to begin cooking.

Steps to Begin Using the Power Quick Pot

To start using your Power Quick Pot, begin by unpacking and washing the inner pot. Plug the power cord into a 240V outlet and ensure the cord is undamaged. Slide the release switch to open the lid and place the inner pot into the base unit. Add your ingredients, ensuring not to exceed the fill line. Replace the lid, twist to lock, and select a preset program using the dial and center button. Allow the cooker to complete the cycle, then release pressure naturally or via quick release. Always refer to the manual for detailed instructions and safety guidelines to ensure optimal performance and safety.

Essential Buttons and Controls

The Power Quick Pot features a user-friendly control panel with essential buttons for seamless operation. The release switch allows you to open the lid safely, while the dial and center button enable you to select preset programs and adjust settings. The power button turns the device on/off, and the start/stop button controls cooking cycles. Additional controls include the keep warm/cancel button for managing cooking modes. These buttons are designed for intuitive navigation, ensuring easy access to various functions like pressure cooking, sautéing, and slow cooking. Familiarize yourself with these controls to maximize your cooking experience and ensure safe, efficient use of the Power Quick Pot.

Common Functions and Settings

The Power Quick Pot offers a variety of preset programs and customizable settings to cater to different cooking needs. Common functions include Pressure Cook, Slow Cook, Sauté, Steam, and Sous Vide. Users can also utilize the Manual mode for precise control over cooking time and pressure. Additional settings like Delay Start allow you to schedule cooking up to 24 hours in advance, while the Keep Warm function ensures your meal stays at the perfect temperature. These features, combined with intuitive controls, make the Power Quick Pot a versatile and user-friendly kitchen appliance for a wide range of recipes and cooking techniques.

Features and Functions

The Power Quick Pot offers multiple built-in safety features, preset programs, and multi-functional cooking capabilities. It supports pressure cooking, slow cooking, sautéing, steaming, and sous vide cooking.

Built-in Safety Features

The Power Quick Pot is equipped with multiple built-in safety features to ensure safe and reliable operation. These include a locking lid mechanism that prevents opening under pressure, automatic shut-off, and overheating protection. The device also features a safety lock lid with a float valve that drops when pressure is released, ensuring the lid cannot be opened until it is safe. Additionally, the cooker is designed to prevent operation if the ceramic pot is empty or if the lid is not properly secured. These features work together to provide a secure cooking environment and protect users from potential hazards, making the Power Quick Pot a safe choice for home use.

Preset Programs and Custom Settings

The Power Quick Pot offers a variety of preset programs for convenient cooking, including Sauté, Steam, Slow Cook, and Sous Vide. These programs allow users to achieve perfect results with minimal effort. Additionally, the device features custom settings that enable users to manually adjust cooking time, pressure levels, and temperature, providing flexibility for specific recipes. The intuitive dial and center button make it easy to navigate and select desired settings. With these features, users can tailor their cooking experience to suit their preferences, whether they’re using a preset program or customizing their own cooking parameters. This versatility makes the Power Quick Pot a versatile tool for both novice and experienced cooks.

Multi-Functional Cooking Capabilities

The Power Quick Pot is designed to be a versatile kitchen appliance, offering a wide range of cooking functions. It excels as a pressure cooker, slow cooker, sauté pan, steamer, and sous vide machine, all in one compact unit. The device also features a Keep Warm mode to maintain food temperature after cooking. With its advanced temperature control and multiple preset programs, users can achieve precise results for various dishes, from hearty stews to delicate sous vide meals. The multi-functional design allows for seamless transitions between cooking methods, making it an indispensable tool for home chefs seeking efficiency and creativity in their culinary endeavors.

Product Specifications

The Power Quick Pot is available in models Y4D-36, Y6D-36, Y8D-36, and Y10D-36, with capacities of 4, 6, 8, and 10 quarts respectively. It features advanced technical specifications and compatibility with various accessories for enhanced cooking convenience.

Model Variations (Y4D-36, Y6D-36, Y8D-36, Y10D-36)

The Power Quick Pot is available in four distinct models: Y4D-36, Y6D-36, Y8D-36, and Y10D-36. These models differ primarily in their cooking capacities, ranging from 4 quarts to 10 quarts, making them suitable for various household sizes and cooking needs. The Y4D-36 is ideal for small families or individuals, while the Y10D-36 is perfect for large families or meal prepping. All models share the same core features and functionalities, ensuring consistency in performance across the lineup. The manual provides specific details for each model, allowing users to optimize their cooking experience based on the selected variant. This variety ensures that every user can find a Power Quick Pot that fits their lifestyle and preferences.

Technical Details and Capacity

The Power Quick Pot models vary in capacity, with the Y10D-36 offering a 10-quart size, ideal for large families or meal prepping. The manual highlights technical specs like a 24-hour delay timer and 12-hour cooking duration. It features 37 multi-functional smart settings for versatile cooking. The device supports pressure cooking, slow cooking, sautéing, steaming, and sous vide. Safety is prioritized with 12 built-in features, including automatic shut-off and keep-warm mode. The manual ensures optimal performance with detailed tech specs tailored to each model, making it a comprehensive guide for users seeking advanced cooking solutions.

Compatible Accessories

The Power Quick Pot supports various accessories to enhance your cooking experience. These include a ceramic pot, sealing rings, and a steam basket, all designed to work seamlessly with the device. Additional accessories like a silicone mitt, extra lids, or specialized cooking containers can also be used. The manual provides guidance on compatible parts and their proper usage. These accessories are available through the manufacturer or authorized retailers, ensuring optimal performance and versatility in cooking. Regularly check for recommended accessories to expand your cooking capabilities and maintain your device effectively. Always ensure compatibility with your specific model for safety and functionality.

Cooking Techniques

The Power Quick Pot manual details various cooking techniques, including pressure cooking, slow cooking, sautéing, steaming, and sous vide, offering guidance to master these methods effectively.

Pressure Cooking Basics

Pressure cooking with the Power Quick Pot is a efficient way to prepare meals up to 70% faster than traditional methods. The manual explains how to use the sealed cooking chamber to build heat and pressure, resulting in flavorful dishes. Before starting, ensure the lid is securely locked, as the safety mechanism prevents opening until pressure is released. The quick pressure release feature allows for immediate depressurization after cooking. Always add liquid as required to avoid scorching and ensure proper pressure buildup. The manual guides users through basic steps: adding ingredients, selecting preset programs, and monitoring cooking time; Understanding these fundamentals enhances cooking results and safety, making pressure cooking accessible for all skill levels. Regular cleaning of the valve and gasket is crucial for maintaining performance.

Slow Cooking and Sautéing

The Power Quick Pot manual details how to utilize slow cooking and sautéing functions for versatile meal preparation. Slow cooking allows for tender results over extended periods, ideal for stews, roasts, and soups. The sauté function enables browning meat, simmering sauces, or cooking vegetables before pressure cooking for added flavor. Users can adjust settings to customize cooking times and temperatures, ensuring dishes are cooked to perfection. The manual provides clear instructions for transitioning between modes, such as switching from sauté to slow cook. These features make the Power Quick Pot a versatile kitchen companion, offering flexibility for various culinary techniques. Detailed guidance ensures users can explore both slow and sauté functions with confidence and ease, enhancing their cooking experience. The manual also includes tips for achieving the best results with these modes, making it a comprehensive resource for all users.

Steam and Sous Vide Cooking

The Power Quick Pot manual provides detailed guidance for steam and sous vide cooking, offering precise temperature control for delicate dishes. Steam cooking is ideal for vegetables, seafood, and poultry, ensuring nutrients are retained while enhancing flavor. Sous vide mode allows for even cooking, perfect for eggs, meats, and desserts, with temperatures adjustable to achieve desired doneness. The manual outlines specific water levels and accessory requirements for steam cooking, such as using the steamer basket. For sous vide, it emphasizes sealing food in airtight bags and setting exact temperatures. Both methods ensure healthy, flavorful results. The manual also includes troubleshooting tips for these functions, ensuring optimal performance and ease of use for all culinary enthusiasts, making it a valuable resource for exploring advanced cooking techniques with confidence.

Troubleshooting

The manual helps identify common issues and solutions, such as lid sealing problems or error codes, ensuring quick resolutions for uninterrupted cooking experiences with the Power Quick Pot.

Common Issues and Solutions

Common issues with the Power Quick Pot include the lid not sealing properly, the cooker not turning on, or food not cooking evenly. For sealing issues, ensure the gasket is clean and properly aligned. If the cooker won’t power on, check the electrical connection and verify the outlet is working. For uneven cooking, adjust the ingredient proportions or cooking time; The manual also addresses error codes like E1 or E2, which often indicate issues like excessive pressure or faulty sensors. Resetting the device or consulting the troubleshooting section can resolve most problems. Regular cleaning and maintenance, as outlined in the manual, help prevent these issues and ensure optimal performance.

Error Codes and Their Meanings

The Power Quick Pot manual PDF provides clear explanations for error codes that may appear during operation. Common error codes include E1, E2, and E3. E1 typically indicates excessive pressure, while E2 suggests a faulty temperature sensor or heating element issue. E3 may signify a problem with the lid sensor or pressure valve. These codes help users identify specific issues quickly. The manual offers step-by-step solutions, such as resetting the device, cleaning sensors, or checking for blockages. Understanding these codes ensures safe and efficient troubleshooting, helping you resume cooking without delay. Always refer to the manual for detailed guidance on resolving error code-related problems.

Resetting the Device

Resetting the Power Quick Pot is a straightforward process to restore default settings. To reset, unplug the device, wait 30 seconds, and plug it back in. This step is useful if the device malfunctions or displays error codes. Resetting does not affect saved custom settings or preset programs. If issues persist after resetting, refer to the manual or contact customer support. Always ensure the device is cool and unplugged before attempting any reset. This process helps resolve software glitches and ensures optimal performance. Regular resets can prevent unexpected errors, keeping your cooking experience smooth and hassle-free.

Maintenance and Cleaning

Regularly clean the Power Quick Pot to ensure optimal performance and longevity. Always unplug the device before cleaning and allow it to cool completely. Wash the inner pot and lid with mild detergent and rinse thoroughly. Avoid abrasive cleaners to prevent damage. Dry all parts thoroughly after cleaning to prevent rust or mold. For tough stains, soak components before scrubbing. Proper maintenance ensures safe and efficient cooking experiences.

Regular Cleaning Procedures

Regular cleaning is crucial to maintain the performance and longevity of your Power Quick Pot. Always unplug the device before cleaning and allow it to cool completely. The inner pot, lid, and sealing ring should be washed with mild detergent and warm water after each use. Avoid using abrasive cleaners or scrubbers, as they may damage the surfaces. For tough stains, soak the components in warm soapy water before scrubbing gently. The condensation collector should be emptied and cleaned regularly to prevent water buildup. After cleaning, dry all parts thoroughly to avoid rust or mold. Proper maintenance ensures safe and efficient cooking experiences with your Power Quick Pot.

Deep Cleaning Tips

For a deeper clean, mix equal parts water and white vinegar in the inner pot and run a steam cycle to descale and remove odors. Soak the inner pot, lid, and sealing ring in warm soapy water for 30 minutes before scrubbing. Use a soft brush to clean the anti-blockage vent and exhaust pipe, ensuring no food particles obstruct airflow. Wipe the exterior with a damp cloth and mild detergent, avoiding harsh chemicals. For stubborn stains, apply baking soda paste and let it sit before rinsing. Regular deep cleaning prevents grease buildup and maintains your Power Quick Pot’s performance. Always refer to the manual for specific guidance on cleaning sensitive parts.

Replacing Parts

Replacing parts on your Power Quick Pot ensures optimal performance and safety. Start by identifying the part that needs replacement, such as the sealing ring, anti-blockage vent, or inner pot. Refer to the manual for specific instructions, as some parts may require special tools or techniques. Order genuine replacement parts from authorized dealers to ensure compatibility and quality. Before replacing, unplug the device and allow it to cool completely. Follow the manual’s step-by-step guide for disassembly and reassembly. If unsure, consult customer support or a professional. Regularly replacing worn-out parts prevents leaks, maintains pressure, and keeps your cooker functioning efficiently. Always store spare parts in a safe place to avoid misplacement.

Accessories and Additional Resources

Explore recommended accessories like the ceramic inner pot and steam basket to enhance your Power Quick Pot experience. Find online resources, recipe books, and customer support details for assistance.

Recommended Accessories

To enhance your Power Quick Pot experience, consider these recommended accessories: a ceramic inner pot for non-stick cooking, a steam basket for healthy steaming, and a glass lid for monitoring meals. Additionally, a silicone sealing ring set and a stainless steel steamer are great for versatile cooking. These accessories are designed to optimize performance and expand your culinary possibilities. They are available for purchase online and are compatible with all Power Quick Pot models, including Y4D-36, Y6D-36, Y8D-36, and Y10D-36. By investing in these accessories, you can unlock more functions and ensure long-term durability of your cooker.

Online Resources and Recipe Books

Explore a wealth of online resources, including the official Power Quick Pot website, which offers free downloadable manuals, recipe books, and guides. The “Quick Start Guide” and “Cooking Techniques Guide” are excellent for mastering your cooker. Additionally, the “Recipe Book” provides diverse meal ideas, from soups to desserts, optimized for the Power Quick Pot. These resources are compatible with all models, including Y4D-36, Y6D-36, Y8D-36, and Y10D-36. Perfect for both new and experienced users, these materials ensure you get the most out of your cooker. Visit the official website or authorized retailers to access these valuable tools and enhance your cooking experience with the Power Quick Pot.

Customer Support Information

For any inquiries or issues with your Power Quick Pot, Tristar Products offers comprehensive customer support. Visit their official website for contact information, including phone numbers and email addresses. The site also features a FAQ section and troubleshooting guides to address common concerns. Additionally, the manual includes a dedicated support page with resources for warranty claims and repair services. For further assistance, users can reach out to the customer service team directly. Ensure to have your model number (e.g., Y4D-36, Y6D-36, Y8D-36, Y10D-36) ready for quicker support. The Power Quick Pot team is committed to helping you resolve any issues promptly and efficiently.

Mastering your Power Quick Pot begins with this manual. Explore its features, follow safety guidelines, and enjoy efficient cooking. Regular updates and support from Tristar Products ensure optimal use and satisfaction;

Final Tips for Optimal Use

For the best experience with your Power Quick Pot, always follow the manual’s guidelines. Regularly clean the device, especially the sealing ring and float valve, to maintain performance. Ensure the inner pot is properly placed to avoid damage. When cooking, do not exceed the recommended fill levels to prevent overflow. Experiment with preset programs for consistent results. For delicate dishes, use the sous vide or sauté functions. Store the device in a cool, dry place when not in use. Refer to the troubleshooting section for common issues and solutions. Keep the manual handy for quick reference. Happy cooking with your Power Quick Pot!

Warranty and Service Information

Your Power Quick Pot is backed by a 1-year limited warranty covering defects in materials and workmanship. Register your product online to activate the warranty. For service, contact customer support using the details provided in the manual. Keep your proof of purchase handy for warranty claims. The warranty does not cover damage caused by misuse or improper maintenance. Refer to the manual for full warranty terms and conditions. If you encounter issues, visit the official website or call the support hotline for assistance. Regular maintenance, as outlined in the manual, ensures your device remains under warranty. Contact Tristar Products directly for any warranty-related queries or repairs.

Feedback and Continuous Improvement

The Power Quick Pot manual encourages users to provide feedback to enhance product performance and user experience. Your input helps Tristar Products identify areas for improvement, ensuring future updates meet customer needs. By sharing your experiences, you contribute to refining features, addressing common issues, and developing new functionalities. The company values your opinions and uses them to innovate and deliver better solutions. Regular software updates and feature enhancements are often based on user feedback. Visit the official website or contact customer support to share your thoughts. Your feedback is instrumental in shaping the future of the Power Quick Pot, ensuring it remains a reliable and efficient cooking companion for years to come.

Categories
Manuals

2023 honda civic owners manual

Welcome to the 2023 Honda Civic Owners Manual! This guide helps you understand your vehicle’s features, maintenance, and safety systems for optimal performance and ownership experience․

Discover the advanced technology, fuel efficiency, and enhanced safety features designed to make your driving experience enjoyable and secure․ Refer to this manual for troubleshooting and customization tips․

Familiarize yourself with the dashboard, controls, and navigation system to maximize convenience․ Regular maintenance schedules and DIY tips are included to keep your Civic in top condition․

Explore the innovative upgrades and specifications that set the 2023 Honda Civic apart․ This manual is your key to unlocking the full potential of your new vehicle․

Importance of the Owners Manual

The 2023 Honda Civic Owners Manual is a vital resource for understanding your vehicle’s operation, maintenance, and safety features․ It provides essential information to ensure optimal performance, fuel efficiency, and longevity․ By following the manual, you can troubleshoot common issues, customize settings, and stay informed about advanced technologies․ Regularly reviewing the manual helps prevent potential damage and ensures compliance with legal standards․ It serves as a comprehensive guide for both new and experienced drivers, offering clear instructions for everyday use and maintenance․ This manual is your go-to reference for maximizing your driving experience and protecting your investment․

New Features in the 2023 Honda Civic

The 2023 Honda Civic introduces exciting upgrades, including an enhanced infotainment system with a larger touchscreen, wireless smartphone integration, and improved voice command functionality․ Safety is prioritized with advanced driver-assistance systems like adaptive cruise control and lane-keeping assist․ The new Civic also features a sport-tuned suspension for better handling and a more responsive driving experience․ Additionally, Honda has incorporated eco-friendly technologies to boost fuel efficiency, making it a more sustainable choice․ These innovations ensure the 2023 Honda Civic stands out as a modern, reliable, and feature-packed vehicle, offering both comfort and performance for drivers of all preferences․

Vehicle Information

Your 2023 Honda Civic is designed for exceptional performance and efficiency, featuring advanced engineering and innovative technology to enhance your driving experience and ensure long-term reliability․

2023 Honda Civic Specifications

The 2023 Honda Civic offers a range of powertrains, including a 2․0L naturally aspirated engine and a 1․5L turbocharged option, delivering up to 180 horsepower and 162 lb-ft of torque․ Available in sedan and hatchback styles, it features a 6-speed manual or CVT transmission․ With EPA ratings of up to 33 MPG city and 42 MPG highway, it combines efficiency with performance․ The Civic boasts a sport-tuned suspension for precise handling and a refined cabin with premium materials․ Advanced safety features, including Honda Sensing, and a 5-star safety rating ensure confidence on the road․ Its modern design and cutting-edge technology make it a standout in its class․

Key Features of the 2023 Honda Civic

The 2023 Honda Civic stands out with its sleek design, featuring LED headlights and a aggressive front grille․ Inside, it offers a spacious cabin with premium materials, heated front seats, and a power-adjustable driver’s seat․ The infotainment system includes a high-resolution 9-inch touchscreen, Apple CarPlay and Android Auto integration, and a premium Bose audio system․ Safety is enhanced with Honda Sensing, including adaptive cruise control, lane-keeping assist, and traffic jam assist․ With Sport and Touring trims available, the Civic delivers a blend of style, comfort, and advanced technology, making it a top choice for modern drivers․

Technical Details and Upgrades

The 2023 Honda Civic offers a 2․0L naturally aspirated engine producing 158 horsepower and 138 lb-ft of torque, or a 1․5L turbocharged engine delivering 180 horsepower and 162 lb-ft of torque․ Both engines are paired with a CVT or 6-speed manual transmission for smooth performance․ The suspension system has been refined for improved handling and ride comfort․ Technology upgrades include a new 9-inch HD touchscreen, wireless Apple CarPlay and Android Auto, and expanded USB-C ports․ The Civic also features enhanced noise insulation and structural rigidity for a quieter, more refined driving experience, solidifying its reputation as a reliable and modern compact car․

Instrument Panels and Controls

The 2023 Honda Civic features an intuitive dashboard with a digital instrument cluster and analog gauges․ Controls are logically arranged for easy access to climate, audio, and driving functions․

Understanding the Dashboard Layout

The 2023 Honda Civic’s dashboard is designed for clarity and convenience․ The central digital instrument cluster displays vital information like speed, fuel level, and navigation․ Analog gauges for RPM and temperature are positioned for easy viewing․ Controls for climate, audio, and driver-assistance systems are logically grouped․ The touchscreen infotainment system dominates the center, offering intuitive access to settings and features․ Illuminated buttons and soft-touch materials enhance the premium feel․ This layout ensures drivers can focus on the road while maintaining easy access to essential functions, creating a seamless and enjoyable driving experience․

Location and Function of Controls

The controls in the 2023 Honda Civic are strategically placed for ease of access․ Steering wheel-mounted buttons manage audio, cruise control, and driver-assistance systems․ The gearshift and parking brake are centrally located for intuitive operation․ Climate controls, including temperature and fan settings, are positioned below the infotainment screen․ The touchscreen interface provides access to navigation, Bluetooth connectivity, and vehicle settings․ Rearview camera controls and hazard light buttons are within easy reach on the dashboard․ This ergonomic design ensures drivers can operate essential functions without distraction, enhancing both safety and convenience during the drive․

Customizing Your Vehicle Settings

The 2023 Honda Civic allows you to tailor your driving experience through customizable settings․ Use the touchscreen to adjust display preferences, audio settings, and driver-assistance features like adaptive cruise control․ Personalize your infotainment system by setting favorite radio stations and pairing Bluetooth devices․ Climate control settings can also be fine-tuned for comfort․ Additionally, the Civic offers customizable driver profiles, enabling multiple users to save their preferred settings for seat position, mirror adjustments, and infotainment preferences․ Voice command functionality further enhances convenience, allowing hands-free control of various features․ Explore these options to create a driving environment that suits your lifestyle and preferences․

Maintenance and Servicing

Regular maintenance ensures your 2023 Honda Civic runs efficiently․ Follow the recommended schedule for oil changes, tire rotations, and inspections to maintain performance and warranty compliance․

Scheduled Maintenance Requirements

Regular maintenance is crucial for the longevity and performance of your 2023 Honda Civic․ Adhere to the recommended schedule outlined in this manual, including oil changes every 5,000 to 7,500 miles, tire rotations, and brake inspections․

Follow the maintenance milestones at 15,000, 30,000, and 60,000 miles for optimal performance․ Neglecting scheduled maintenance may lead to reduced fuel efficiency, increased emissions, and potential damage to engine components․ Always use genuine Honda parts and consult a certified technician for servicing to ensure warranty compliance and maintain your vehicle’s reliability and safety on the road․

DIY Maintenance Tips

Performing routine DIY maintenance can help keep your 2023 Honda Civic in excellent condition․ Start with regular oil changes using the recommended viscosity for your climate․ Check and maintain proper tire pressure, as specified in the manual, to improve fuel efficiency and handling․

Inspect and replace the air filter every 15,000 to 30,000 miles to ensure optimal engine performance․ Additionally, monitor the battery terminals for corrosion and clean them if necessary․ For brake pads, inspect for wear and replace them when thickness falls below 1/8 inch․ Always refer to your owner’s manual for specific guidelines and safety precautions before starting any DIY maintenance․

Resetting the Maintenance Light

To reset the maintenance light on your 2023 Honda Civic, start by turning the ignition to the “ON” position without starting the engine․ Use the steering wheel controls to navigate to the “Settings” or “Vehicle Health” menu․ Select “Maintenance” and choose the option to reset the maintenance light or due service reminder․ Confirm the reset, and the light should turn off․ If the light remains on, repeat the process or consult a professional․ This simple procedure allows you to keep track of your vehicle’s maintenance needs accurately․

Safety Features

The 2023 Honda Civic is equipped with advanced safety technologies, including collision mitigation, lane-keeping assist, and adaptive cruise control․ These features enhance driver confidence and vehicle protection․

Advanced Safety Technologies

The 2023 Honda Civic features cutting-edge safety innovations․ The Honda Sensing® suite includes Collision Mitigation Braking, Lane Keeping Assist, and Adaptive Cruise Control․ These technologies work seamlessly to prevent accidents and enhance driver confidence․ The system uses cameras and sensors to monitor the road, providing alerts and interventions when necessary․ Additionally, the Civic offers a multi-angle rearview camera and automatic high beams, ensuring superior visibility and safety in various driving conditions․ These advanced features make the 2023 Honda Civic one of the safest vehicles in its class, prioritizing the well-being of both drivers and passengers․

Understanding Airbag Systems

The 2023 Honda Civic is equipped with a comprehensive airbag system designed to provide superior protection in the event of a collision․ The vehicle features multiple airbags, including front, side, and curtain airbags, which deploy strategically to minimize injury․ The system is integrated with sensors that detect the severity and type of impact, ensuring optimal deployment force․ Additionally, the airbags work in conjunction with seatbelts to maximize occupant safety․ It is essential to follow the manufacturer’s guidelines for proper use and maintenance of this system, as outlined in the owners manual, to ensure its reliability and effectiveness in emergency situations․

Seatbelt and Child Safety Features

The 2023 Honda Civic prioritizes occupant safety with advanced seatbelt and child safety features․ All seats are equipped with three-point seatbelts, and the rear seats feature the LATCH (Lower Anchors and Tethers for Children) system for secure child seat installation․ The vehicle includes a seatbelt reminder system to ensure all occupants are properly restrained․ Additionally, the Civic offers child-safe rear door locks to prevent accidental opening․ These features, combined with the robust airbag system, provide a safe environment for passengers of all ages․ The owners manual provides detailed guidance on proper seatbelt use and child seat installation for optimal protection․

Driving Tips

Optimize fuel efficiency with Eco Mode, ensure smooth acceleration, and maintain safe distances․ Regular tire checks and proper vehicle loading enhance performance and safety for a better driving experience․

Eco Mode and Fuel Efficiency

The 2023 Honda Civic offers an Eco Mode to enhance fuel efficiency by optimizing engine performance and reducing energy consumption․ Activate Eco Mode for improved mileage in city driving conditions․

Combine Eco Mode with steady speeds and gentle acceleration for maximum efficiency․ Regular tire pressure checks and proper vehicle maintenance further support fuel economy and overall performance․

Optimizing Performance

The 2023 Honda Civic delivers exceptional performance through its refined engine and advanced transmission systems․ For optimal driving, use the Eco Mode for fuel efficiency or switch to Sport Mode for a more dynamic experience․

Regularly check and maintain proper tire pressure, as this enhances handling and fuel economy․ Ensure your vehicle is serviced according to the recommended schedule in the owner’s manual to keep it running at peak performance․

Additionally, avoid extreme temperatures and ensure proper fluid levels to maintain engine health․ By following these tips, you can enjoy a smooth and powerful driving experience in your Honda Civic․

Safe Driving Practices

Always wear your seatbelt and ensure all passengers do the same․ Properly secure child seats and restraints to ensure safety for younger passengers․

Adhere to speed limits and maintain a safe distance from other vehicles․ Avoid distractions like using your phone while driving․

Be aware of your surroundings, especially in low visibility conditions․ Use headlights appropriately and ensure mirrors are adjusted for optimal visibility․

Familiarize yourself with the Honda Sensing® suite of safety features, such as collision mitigation and lane-keeping assist, to enhance your driving safety․

Regularly check tire pressure and brakes to maintain vehicle safety and performance․

Infotainment and Navigation

The 2023 Honda Civic features an advanced infotainment system with a high-resolution touchscreen, seamless Bluetooth connectivity, and integrated navigation for a convenient and enjoyable driving experience․

Using the Touchscreen System

The 2023 Honda Civic’s touchscreen system is user-friendly and responsive․ Access features like navigation, audio, and climate control with intuitive taps and swipes․ Customize home screens to prioritize frequently used functions․ Voice command integration allows hands-free operation, enhancing safety and convenience․ The system supports Apple CarPlay and Android Auto for seamless smartphone integration․ Adjust settings like brightness and wallpaper to personalize your experience․ Regular software updates ensure optimal performance and new feature additions․ Explore the menu options to discover all capabilities and tailor the interface to your preferences for a more enjoyable and connected drive․

Connecting Bluetooth and Smartphones

To connect your smartphone to the 2023 Honda Civic, enable Bluetooth on your device and ensure it is in pairing mode․ Select “Bluetooth” in the vehicle’s touchscreen menu, and confirm the connection․ Once paired, you can access calls, messages, and music seamlessly․ Voice commands allow hands-free control for enhanced safety․ For troubleshooting, restart your phone or vehicle, and ensure Bluetooth is enabled․ Regular software updates maintain compatibility and optimize performance․ This feature ensures a connected and convenient driving experience, integrating your smartphone’s functionality with the Civic’s advanced infotainment system․

Navigating with Honda Navigation

The 2023 Honda Civic features an advanced navigation system designed for seamless route planning․ Enter destinations using voice commands or the touchscreen interface for convenient operation․ The system provides turn-by-turn directions, real-time traffic updates, and alternate route suggestions to avoid congestion․ Points of interest, such as gas stations or restaurants, are easily accessible․ Regular map updates ensure accurate and up-to-date information․ The navigation system integrates with the infotainment display, offering a user-friendly experience․ Whether commuting or exploring new areas, Honda Navigation enhances your driving experience by providing clear guidance and minimizing travel time, ensuring you reach your destination efficiently and stress-free․

Troubleshooting

The 2023 Honda Civic Owners Manual provides guidance for resolving common issues, interpreting error codes, and resetting systems․ Refer to this section for solutions to maintain peak performance and address concerns promptly․

Common Issues and Solutions

The 2023 Honda Civic Owners Manual addresses common issues such as warning light notifications, connectivity problems, and navigation glitches․ For warning lights, check the manual to identify their meaning and resolve the issue promptly․ Connectivity issues with Bluetooth or smartphone pairing can often be fixed by restarting the infotainment system or resetting device connections․ Navigation glitches may require updating the map software or recalibrating the system․ Always refer to the troubleshooting section for step-by-step solutions to ensure your vehicle operates smoothly․ Regular updates and maintenance can prevent many of these issues, enhancing your overall driving experience․

Understanding Warning Lights

The 2023 Honda Civic Owners Manual provides detailed explanations for warning lights on your dashboard․ These indicators signal important information about your vehicle’s status․ The manual categorizes lights by color: red for critical issues like engine or brake problems, yellow for system notifications such as maintenance needs, and green or blue for operational statuses like high beams or cruise control․ Familiarize yourself with each symbol to address issues promptly․ Ignoring warning lights can lead to more severe problems․ Refer to the manual for accurate interpretations and recommended actions to ensure your safety and maintain your vehicle’s optimal performance․

Resetting the Diagnostic System

Resetting the diagnostic system in your 2023 Honda Civic is essential after addressing issues or clearing trouble codes․ Locate the “Trip” button on the dashboard and press it until the odometer displays zeros․ Turn the ignition to the “ON” position without starting the engine․ Press and hold the “Reset” button until the dashboard lights flash․ Release and press again to confirm․ This process clears stored fault codes and resets the system․ If issues persist, consult a professional technician․ Always refer to the manual for specific instructions to ensure proper reset procedures and maintain your vehicle’s diagnostic accuracy․

Legal and Regulatory Information

Your 2023 Honda Civic complies with all applicable safety and emissions standards․ Ensure compliance with local laws and regulations․ Refer to the manual for warranty details and emissions information․

Warranty Information

Your 2023 Honda Civic is backed by a comprehensive warranty program designed to protect your investment․ The basic warranty covers parts and labor for defects in materials or workmanship for a specified period or mileage․ Additionally, the powertrain warranty provides extended coverage for critical engine and transmission components․ Regular maintenance, as outlined in the manual, is essential to ensure warranty validity․ For detailed terms and conditions, refer to the warranty section in your manual or contact Honda support․ This program reflects Honda’s commitment to quality and customer satisfaction, ensuring peace of mind throughout your ownership experience․

Compliance and Regulatory Standards

The 2023 Honda Civic is designed and manufactured to meet or exceed all applicable safety, emissions, and regulatory standards in regions where it is sold․ This includes compliance with federal and local regulations for environmental protection, noise reduction, and occupant safety․ Honda ensures adherence to global standards, such as those set by the U․S․ Environmental Protection Agency (EPA) and the National Highway Traffic Safety Administration (NHTSA)․ The vehicle is also equipped with advanced safety technologies to meet stringent crash test ratings․ By complying with these standards, the Civic contributes to a safer and more sustainable driving environment for all road users․

Appendices

The appendices provide a glossary of technical terms, contact information for Honda support, and supplementary materials for further reference, ensuring comprehensive understanding of your vehicle’s features and maintenance․

Glossary of Terms

The glossary section defines key automotive and technical terms related to the 2023 Honda Civic, ensuring clarity for owners․ It explains components like ABS, ECO mode, and infotainment systems, helping users understand their vehicle’s technology and features․ This resource aids in troubleshooting and maintenance by providing clear definitions of industry-specific jargon․ Whether you’re a new driver or a seasoned owner, the glossary serves as a quick reference guide to enhance your understanding and operation of the Honda Civic․ It covers all aspects of the vehicle, from performance to safety features, making it an essential tool for every owner․

Contact Information for Support

For any inquiries or assistance regarding your 2023 Honda Civic, contact Honda’s customer support team․ Visit the official Honda website for regional contact details․ You can reach Honda’s customer service at 1-800-999-1009 (available 24/7) or email support@honda․com․ Additionally, your local Honda dealership can provide personalized assistance․ For technical support or navigation-related questions, refer to the Honda Navigation Center at 1-877-999-7870․ International customers should check the Honda global website for country-specific contact information․ This section ensures you have all necessary resources to address any concerns promptly and effectively․

Categories
Manuals

hayward s180t sand filter manual

The Hayward S180T Sand Filter is a high-performance, corrosion-proof filtration system designed for efficient pool maintenance. It combines superior flow rates with ease of operation, making it a reliable choice for pool owners.

1;1 Overview of the Hayward S180T Sand Filter

The Hayward S180T Sand Filter is a high-performance filtration system designed for efficient pool maintenance. It is part of the Pro Series, known for its high-rate sand filtration technology. This filter is constructed with durable, corrosion-proof materials, ensuring long-lasting reliability. Its design blends superior flow characteristics with ease of operation, making it a popular choice for pool owners. The S180T is engineered to provide crystal-clear water by capturing dirt and debris effectively. It is suitable for various pool sizes and is compatible with both residential and commercial setups. The filter’s operation is straightforward, with features like backwashing for maintenance. Its energy-efficient design helps reduce operational costs. Overall, the Hayward S180T Sand Filter is a robust and user-friendly solution for maintaining clean and safe pool water.

1.2 History and Development of Hayward Pool Filters

Hayward has been a leader in pool equipment innovation for decades, with a strong focus on delivering durable and efficient solutions. The development of Hayward pool filters, including the S180T, reflects the company’s commitment to advancing water filtration technology. Established with a vision to provide superior pool maintenance systems, Hayward has consistently introduced groundbreaking designs that address the evolving needs of pool owners. Over the years, the company has refined its sand filtration systems, incorporating high-quality materials and cutting-edge engineering to ensure optimal performance. The S180T model represents the culmination of this expertise, offering a corrosion-proof and high-flow filtration solution. By prioritizing innovation and customer satisfaction, Hayward has solidified its reputation as a trusted name in the pool industry, with the S180T standing as a testament to its dedication to excellence.

Key Features and Benefits of the Hayward S180T

The Hayward S180T Sand Filter offers high-performance filtration with a corrosion-proof design, ensuring superior flow rates and ease of operation. Its advanced features make it a reliable and efficient choice for pool maintenance.

2.1 Design and Construction of the S180T

The Hayward S180T Sand Filter is built with a durable, corrosion-proof design, ensuring long-lasting performance in various environmental conditions. Its robust construction features a high-strength resin tank that withstands pressure and harsh weather. The filter’s modular design allows for easy installation and maintenance, while its compact footprint makes it suitable for smaller pools or spaces with limited area. The S180T includes a secure, tamper-proof lid and a precise valve system for smooth operation. Its advanced flow characteristics ensure optimal water circulation, maintaining clean and clear pool water. The filter’s design emphasizes ease of use, with intuitive controls and a transparent inspection window for monitoring sand levels. This combination of durability, efficiency, and user-friendly features makes the S180T a reliable choice for pool owners seeking a high-performance filtration system.

2.2 High-Performance Flow Rates

The Hayward S180T Sand Filter is engineered to deliver exceptional flow rates, ensuring optimal water circulation and filtration for pools of various sizes. Its high-performance design allows for efficient water turnover, maintaining crystal-clear water quality. With a focus on hydraulic efficiency, the S180T minimizes energy consumption while maximizing filtration performance. This makes it ideal for pool systems that require consistent and reliable water flow. The filter’s advanced design ensures that water flows smoothly through the sand media, capturing dirt and debris effectively. By maintaining high flow rates, the Hayward S180T supports the overall health and clarity of your pool water, making it a top choice for pool owners seeking dependable filtration. Its superior flow characteristics also make it compatible with a wide range of pool pumps and accessories, ensuring seamless integration into any pool system.

2.3 Advanced Filtration Efficiency

The Hayward S180T Sand Filter is renowned for its advanced filtration efficiency, ensuring crystal-clear pool water with minimal maintenance. Its high-quality sand and precise engineering allow it to capture even the finest particles, providing superior water clarity. The filter’s design maximizes contact time between water and sand, enhancing the removal of contaminants. With optimal flow rates, the S180T maintains efficiency without restricting water flow, ensuring smooth operation. Regular backwashing is simplified, keeping the sand clean and prolonging the filter’s performance. The S180T’s advanced features mean it effectively traps debris, reducing wear and tear and extending its lifespan. This results in cleaner water, fewer contaminants, and less maintenance for pool owners. By maintaining the sand level and following care tips, users can preserve the filter’s efficiency, ensuring their pool stays pristine. The Hayward S180T’s combination of quality and design makes it a top choice for effective and efficient filtration.

2.4 Eco-Friendly and Energy-Efficient Design

The Hayward S180T Sand Filter is designed with eco-friendliness and energy efficiency in mind. Its advanced filtration system minimizes water waste and reduces the need for frequent backwashing, which helps conserve water and energy; The filter’s high-flow design ensures optimal performance while using less energy, making it a cost-effective and environmentally responsible choice for pool owners. Additionally, the corrosion-proof construction reduces the need for chemical treatments, further lowering its environmental impact. Hayward has prioritized sustainability in the S180T, ensuring it aligns with modern eco-conscious standards. This filter not only maintains clean and safe pool water but also supports energy-saving practices, making it a greener option for pool maintenance. By combining efficiency with reduced resource consumption, the S180T stands out as an eco-friendly solution for pool filtration needs.

Installation Guide for the Hayward S180T

The Hayward S180T installation requires proper placement, leveling, and connection to pool plumbing. Ensure all components are secure, and follow the manual for precise setup and connection procedures to avoid leaks.

3.1 Pre-Installation Checks and Requirements

Before installing the Hayward S180T Sand Filter, ensure your pool system meets all compatibility requirements. Verify that the filter is suitable for your pool size and pump specifications. Inspect the filter and its components for any damage or defects. Choose a location with proper drainage and accessibility for maintenance. Ensure the area is level to prevent uneven installation, which could affect performance. Check the plumbing size and connections to match the filter’s inlet and outlet ports. Review the manual to confirm all parts are included and understand the installation sequence. Ensure the electrical supply meets the filter’s power requirements. Proper preparation and adherence to these checks will ensure a smooth installation process and optimal performance of the Hayward S180T Sand Filter.

3.2 Step-by-Step Installation Process

Begin by preparing the installation site, ensuring it is level and close to the pool equipment pad. Unpack the Hayward S180T sand filter and inspect for damage. Connect the inlet and outlet pipes according to the manual’s diagrams, ensuring proper alignment with the pool pump. Install the filter valve and connect the backwash hose. Pour the recommended grade of sand into the tank, following the manufacturer’s guidelines. Tighten all connections securely and test for leaks. Finally, power on the system and run a test cycle to ensure proper operation. Always refer to the Hayward S180T sand filter manual for specific details and safety precautions.

  • Ensure the site is level and accessible.
  • Connect plumbing carefully to avoid leaks.
  • Add the correct amount of sand for optimal performance.
  • Test the system thoroughly after installation.

Proper installation ensures efficient and long-lasting performance of the filter.

3.3 Post-Installation Setup and Testing

After installing the Hayward S180T Sand Filter, ensure all connections are secure and free from leaks. Prime the pump and start the system, allowing it to run for a few minutes to check for proper operation. Monitor the filter’s pressure gauge to ensure it falls within the recommended range. Test the flow rate by observing water clarity and flow strength. Check for any air leaks in the system, as they can affect performance. Once the system is running smoothly, verify that the sand is evenly distributed and the backwash function operates correctly. Finally, document the initial settings and schedule the first routine maintenance. Proper setup and testing ensure optimal performance and longevity of the filter. Always refer to the manual for specific guidance tailored to your system.

Maintenance and Care Tips

Regular backwashing and checking for worn parts ensure optimal performance. Replace sand every 5-7 years for consistent filtration. Follow a maintenance schedule to prolong the filter’s life and maintain clean pool water effectively.

4.1 Routine Maintenance Schedule

Regular maintenance is essential to ensure the Hayward S180T Sand Filter operates efficiently and prolongs its lifespan. Begin with weekly checks: inspect the filter gauge to monitor pressure levels, and backwash when the pressure rises 8-10 PSI above the clean starting level. Monthly, inspect the sand for wear and tear, ensuring it hasn’t degraded or compacted excessively. Every 3-6 months, clean the filter’s O-ring and gaskets to prevent leaks. Annually, inspect the valve and piping for damage or corrosion. Every 5 years, replace the sand entirely, using high-quality silica sand of the correct grade. Additionally, lubricate moving parts and check for any signs of wear on components like the diffuser or laterals. A consistent maintenance routine ensures optimal performance, prevents operational issues, and maintains clean, safe pool water. Always refer to the Hayward S180T manual for specific guidance tailored to your unit.

4.2 Cleaning and Backwashing the Filter

Regular cleaning and backwashing are essential to maintain the efficiency of the Hayward S180T Sand Filter. Start by turning off the pool pump and ensuring the system is depressurized. Locate the multiport valve and switch it to the ‘backwash’ position. Turn the pump back on to reverse the flow of water, allowing dirt and debris to be flushed out through the backwash hose. Monitor the pressure gauge; if it increases by 8-10 psi, backwashing is necessary. After backwashing, switch the valve to ‘rinse’ to remove any remaining debris. Finally, return the valve to ‘filter’ and resume normal operation. Regularly inspect the sand level and top it off as needed. For deeper cleaning, consider using a filter cleaner every 1-2 months. Always follow the manufacturer’s guidelines for optimal performance and longevity of the filter. Proper maintenance ensures clean pool water and extends the lifespan of your Hayward S180T Sand Filter.

4.3 Replacing the Sand and Other Wearable Parts

Replacing the sand in your Hayward S180T Sand Filter is essential for maintaining optimal performance. The recommended frequency for changing the sand is every 5 to 7 years, depending on usage. Start by turning off the pool pump and relieving pressure in the system. Carefully remove the top valve and dismantle the filter to access the sand. Use a shop vacuum or buckets to remove the old sand, taking note of the sand level recommended by the manufacturer. Replace with high-quality silica sand, ensuring it’s evenly distributed. Reassemble the filter and perform a backwash cycle to clean the sand. Additionally, inspect and replace wearable parts like gaskets, O-rings, and laterals if they show signs of wear. Regularly replacing these components ensures proper filtration and prevents leaks or reduced flow rates. Always refer to the Hayward S180T manual for specific instructions and part numbers to maintain your filter’s efficiency and longevity.

Troubleshooting Common Issues

The Hayward S180T may experience issues like low flow rates or sand leaks. Check for blockages, ensure proper sand levels, and monitor pressure gauges. Addressing these promptly ensures optimal performance and longevity.

5.1 Identifying Common Problems with the S180T

The Hayward S180T Sand Filter is generally reliable, but like any equipment, it can experience issues. Common problems include low water flow, high pressure readings, or leaks. These issues often stem from clogged filters, damaged laterals, or loose connections. Another problem is sand entering the pool, which indicates worn or broken lateral assemblies. Pressure gauge malfunctions or backflow issues can also arise; Regular maintenance, such as backwashing and checking for worn parts, helps prevent these problems. If issues persist, consulting the manual or contacting Hayward support is recommended to ensure proper troubleshooting and repair. Always follow manufacturer guidelines to maintain optimal performance and extend the filter’s lifespan.

5.2 Diagnosing and Solving Operational Issues

When addressing operational issues with the Hayward S180T Sand Filter, start by identifying the specific problem. Common symptoms include low flow rates, excessive pressure, or sand returning to the pool. For low flow rates, check for clogged laterals or dirty sand. Backwashing the filter or replacing the sand may resolve this. If pressure is too high, inspect the valve for proper function and ensure there are no blockages in the system. Leaks around connections or the tank can often be fixed by tightening loose fittings or replacing worn-out gaskets. Always refer to the manual for guidance on disassembling components safely. If issues persist after routine maintenance, consider consulting a professional to inspect for internal damage or faulty parts. Regular troubleshooting can prevent major malfunctions and extend the filter’s lifespan.

5.3 When to Seek Professional Assistance

While the Hayward S180T Sand Filter is designed for reliability and ease of use, certain issues may require professional expertise. If you encounter major leaks, electrical malfunctions, or significant damage to the tank or valves, it’s best to contact a qualified technician. Additionally, if the filter’s performance doesn’t improve after routine maintenance or backwashing, professional diagnosis is recommended. Electrical issues, such as faulty sensors or wiring problems, should always be handled by a licensed professional to ensure safety. Persistent operational problems or system inefficiencies that aren’t resolved by troubleshooting steps outlined in the manual also warrant expert intervention. Regular maintenance can prevent many issues, but when complex problems arise, seeking professional assistance ensures the longevity and optimal performance of your Hayward S180T Sand Filter. Always prioritize safety and efficiency by consulting a certified pool technician for severe or unresolved issues.

Hayward S180T Parts and Accessories

The Hayward S180T Sand Filter requires specific parts like the filter tank, valve, and pressure gauge for optimal performance. Genuine accessories ensure compatibility and longevity, available through authorized Hayward dealers.

6.1 Overview of Compatible Parts

The Hayward S180T Sand Filter is designed to work seamlessly with a range of compatible parts, ensuring optimal performance and longevity. These include the filter tank, valve assembly, pressure gauge, and sand. Genuine Hayward parts are engineered to meet specific standards, guaranteeing reliability. Additionally, accessories like O-rings, gaskets, and clamp unions are available to maintain the system’s integrity. It’s crucial to use only authorized components to avoid compromising the filter’s efficiency and warranty. Compatible parts are widely available through Hayward dealers and online retailers, making maintenance and repairs convenient. Always refer to the official manual or consult Hayward support to ensure compatibility before purchasing or installing any parts. This ensures your filter operates efficiently and maintains its high-performance capabilities.

6.2 Replacing Worn-Out Components

Replacing worn-out components of the Hayward S180T Sand Filter is essential to maintain its performance and longevity. Regular inspection of parts such as the filter sand, O-rings, and gaskets is recommended. Over time, the sand may lose its efficiency and need replacement every 3-5 years, depending on usage. Worn O-rings and gaskets can cause leaks, so they should be replaced promptly. To replace these components, turn off the pump, drain the filter, and disassemble the unit carefully. Ensure all connections are clean and free of debris before installing new parts. Proper alignment and tightening of components are crucial to avoid leaks. Always refer to the Hayward S180T manual for specific instructions and diagrams. Using genuine Hayward replacement parts is highly recommended to ensure compatibility and maintain the filter’s performance. Regular replacement of worn-out components will help keep your pool water clean and clear while preventing costly repairs.

6.3 Where to Buy Genuine Hayward Parts

To ensure optimal performance and maintain the warranty of your Hayward S180T Sand Filter, it is crucial to purchase genuine Hayward parts. These components are specifically designed to meet the manufacturer’s quality standards and are compatible with your filtration system. You can find genuine Hayward parts through authorized dealers, online retailers, or directly from Hayward’s official website. Many pool supply stores also carry a wide range of Hayward accessories and replacement parts. When shopping online, verify the seller’s authenticity to avoid counterfeit products. Additionally, Hayward has a global network of distributors, making it easy to locate parts in your region. Always check for the Hayward logo and part number to confirm authenticity. By investing in genuine parts, you ensure long-term reliability and efficiency for your S180T Sand Filter.

The Hayward S180T Sand Filter is a reliable choice for pool owners, offering efficient filtration and durability. Regular maintenance ensures optimal performance. Follow the manual for best results and long-term satisfaction.

7.1 Summary of Key Points

The Hayward S180T Sand Filter is a high-performance, corrosion-proof system designed for efficient pool filtration. It offers superior flow rates, ease of operation, and advanced filtration efficiency. Key benefits include eco-friendly design, high-performance flow rates, and reliable long-term use. Proper installation, regular maintenance, and timely troubleshooting are essential for optimal performance. Routine tasks like backwashing and sand replacement ensure the filter operates efficiently. Troubleshooting common issues early prevents major problems, and using genuine Hayward parts guarantees longevity. Following the manual and best practices ensures a clean, safe pool environment. Always refer to the official Hayward S180T manual for detailed guidance and specifications.

7.2 Best Practices for Long-Term Use

To ensure the Hayward S180T Sand Filter operates efficiently and lasts for years, regular maintenance is essential. Always follow the manufacturer’s guidelines for backwashing and cleaning the filter. Check the sand level periodically and replace it as recommended, typically every 3-5 years. Inspect the filter’s O-rings and gaskets for signs of wear and replace them promptly to prevent leaks. Use genuine Hayward replacement parts to maintain performance and warranty validity. Additionally, monitor the filter’s pressure gauge and address any unusual increases, as this could indicate clogged sand or debris buildup. Keep the surrounding area clean to avoid contamination and ensure proper water circulation. By adhering to these best practices, you can optimize the filter’s performance, reduce energy consumption, and enjoy crystal-clear pool water for years to come. Consistent care will also minimize the need for costly repairs and extend the lifespan of your Hayward S180T Sand Filter.

Categories
Manuals

skyjack sjiii 3219 parts manual

Welcome to the Skyjack SJIII 3219 parts manual, designed to provide detailed information on components, maintenance, and troubleshooting for optimal equipment performance and safety․ This guide includes exploded diagrams, parts listings, and essential procedures to ensure proper usage and longevity of your scissor lift․

1․1 Purpose of the Manual

The Skyjack SJIII 3219 parts manual is designed to provide comprehensive guidance for identifying, ordering, and replacing parts for the SJIII 3219 scissor lift․ This document serves as an essential resource for technicians, service personnel, and operators to ensure proper maintenance, repair, and operation of the equipment․ It includes detailed exploded diagrams, numerical and alphabetical part indexes, and compatibility information to simplify the identification process․ The manual also outlines safety precautions and troubleshooting techniques to address common issues efficiently․ By following the guidelines in this manual, users can maintain equipment performance, extend service life, and ensure compliance with safety standards․ Additionally, it provides access to manufacturer support and warranty details for further assistance․ This manual is a critical tool for anyone involved in the upkeep and operation of the Skyjack SJIII 3219․

1․2 Scope of the Manual

This manual is specifically tailored for the Skyjack SJIII 3219 scissor lift, providing detailed information on parts identification, maintenance procedures, and troubleshooting․ It covers a wide range of topics, including exploded diagrams of key components, numerical and alphabetical part indexes, and compatibility with other Skyjack models․ The document also includes lubrication guidelines, inspection checklists, and diagnostic techniques to ensure optimal performance and safety․ Additionally, it provides information on error codes, safety precautions, and emergency procedures․ The scope extends to warranty details and manufacturer support resources․ This manual is designed to assist technicians, service personnel, and operators in maintaining, repairing, and operating the Skyjack SJIII 3219 effectively, ensuring compliance with safety standards and extending the equipment’s service life․

1․3 Conventions Used in the Manual

This manual employs specific conventions to ensure clarity and consistency․ Parts are identified using numerical and alphabetical indexes, with exploded diagrams provided for visual reference․ Components are labeled with their respective part numbers, which correspond to the detailed listings in the numerical index․ Compatibility information is highlighted for ease of reference with other Skyjack models․ Safety precautions and warnings are emphasized in bold or highlighted boxes to draw attention․ Technical terms and specific procedures are defined within the context to avoid confusion․ The manual also uses standardized symbols and abbreviations, such as “SJIII 3219,” to denote specific models or systems․ Torque specifications and lubrication guidelines are presented in tabular form for quick access․ These conventions are designed to make the manual user-friendly and accessible for technicians and operators alike, ensuring accurate and efficient use of the information provided․

Exploded Diagrams

Exploded diagrams provide detailed visual representations of the Skyjack SJIII 3219’s components, enabling easy identification and assembly of parts․ These diagrams cover key systems, including hydraulic and electrical components․

2․1 Overview of Key Components

The Skyjack SJIII 3219 features a robust design with essential components ensuring reliable operation․ Key parts include the control module, motor, hydraulic cylinder, and platform assembly․ The control module manages all electrical functions, while the motor powers the hydraulic system․ The hydraulic cylinder is crucial for lifting and lowering the platform․ Additional components like the battery, joystick controller, and safety sensors ensure smooth operation․ Each part is designed for durability and compatibility, with specific models like SJIII 3215 and SJIII 3219 sharing similar architectures․ Exploded diagrams in this manual provide a detailed breakdown of these components, aiding in identification and assembly․ Refer to the diagrams for a visual understanding of how these parts integrate to form the complete scissor lift system․

2․2 Hydraulic System Components

The hydraulic system of the Skyjack SJIII 3219 is a critical subsystem responsible for powering the lift’s movements․ It consists of a hydraulic cylinder, pump, control valves, and fluid reservoir․ The hydraulic cylinder is the central component, enabling the platform to ascend and descend smoothly․ The pump generates the pressure needed to drive the system, while the control valves regulate fluid flow and direction․ The reservoir stores the hydraulic fluid, ensuring consistent system operation․ These components work together to provide precise control and reliable performance․ The hydraulic system’s design ensures minimal maintenance and optimal efficiency․ Proper alignment and function of these parts are essential for safe and effective operation of the scissor lift․

2․3 Electrical System Components

The electrical system of the Skyjack SJIII 3219 is designed to ensure efficient and safe operation of the scissor lift․ Key components include the control panel, joystick controller, sensors, and wiring harness․ The control panel houses the electrical circuits and interfaces for machine operation, while the joystick controller enables precise movement control․ Sensors monitor critical functions such as platform height and tilt, providing real-time feedback to the system․ The wiring harness connects all electrical components, ensuring reliable communication and power distribution․ Additionally, the system includes emergency stop buttons and diagnostic modules to enhance safety and troubleshooting capabilities․ Proper functioning of these components is essential for smooth and safe operation of the lift․ Regular inspection and maintenance of the electrical system are recommended to prevent malfunctions and ensure longevity․

Parts Listing

  • Numerical Index: Organized by part numbers for quick reference․
  • Alphabetical Index: Categorizes parts by name for easy searching․
  • Cross-Reference: Matches parts with compatible Skyjack models․
  • Compatibility: Lists interchangeable parts with other Skyjack units․

This section provides a comprehensive catalog of all components, ensuring efficient identification and ordering of parts for the SJIII 3219 scissor lift․

3․1 Numerical Index of Parts

The numerical index provides a detailed listing of all parts for the Skyjack SJIII 3219, organized by part number for quick and efficient reference․ Each entry includes the part number, description, and quantity required, ensuring accurate identification and ordering․ This section is essential for technicians and operators needing to locate specific components rapidly․ The index covers everything from motor brushes (e․g․, 117129) to joytick controllers (e․g․, 159108), providing a comprehensive overview of the scissor lift’s components․ Users can cross-reference part numbers with exploded diagrams for visual identification․ The numerical index is a critical tool for maintaining and servicing the SJIII 3219, ensuring parts are correctly specified and ordered․ Always consult this section before purchasing or replacing components to guarantee compatibility and accuracy․

3․2 Alphabetical Index of Parts

The alphabetical index of parts is a valuable resource for quickly locating components by their names․ This section lists parts alphabetically, making it easier to identify and reference them without searching through numerical listings․ Entries include descriptions and corresponding part numbers, such as “Motor Brushes” (117129) or “Joytick Controller” (159108)․ This index is particularly useful for technicians and operators who are familiar with component names but may not know the associated numbers․ By cross-referencing with the numerical index or exploded diagrams, users can ensure accurate part identification․ The alphabetical index enhances efficiency in parts lookup, reducing downtime during maintenance or repairs․ It is an essential tool for anyone working with the Skyjack SJIII 3219, providing a user-friendly approach to parts identification and management․ This section is designed to simplify the parts identification process․

3․3 Cross-Reference of Part Numbers

The cross-reference of part numbers is a critical tool for identifying compatible or interchangeable components․ This section allows users to locate parts by their function or alternate designations, ensuring accurate ordering and installation․ For example, part number 117129 refers to motor brushes, while 159108 corresponds to a joystick controller․ By cross-referencing, users can verify if a part is suitable for their specific model, such as the SJIII 3219․ This feature is especially useful when a part number is unknown but its application or function is clear․ The cross-reference also helps prevent errors by ensuring compatibility with other Skyjack models, such as the SJIII 3215․ This section is essential for technicians and operators needing to maintain or repair equipment efficiently․ It streamlines the parts identification process, reducing downtime and ensuring proper functionality․

3․4 Compatibility with Other Skyjack Models

This section highlights the compatibility of parts from the SJIII 3219 with other Skyjack models, ensuring flexibility in maintenance and repairs․ Many components, such as motor brushes (part number 117129) and joystick controllers (part number 159108), are interchangeable with models like the SJIII 3215 and SJIII 3220․ This compatibility reduces the need for multiple inventories of parts․ For example, the control system for the SJIII 3219 is also suitable for the SJIII 3226 and SJIII 4632․ Users can verify compatibility by referencing the numerical or alphabetical index of parts․ This feature is particularly useful for fleets with multiple Skyjack models, as it simplifies parts management and reduces downtime․ Always consult the manufacturer’s guidelines to ensure proper installation and functionality of cross-compatible components․ This section is designed to help users optimize their parts inventory and streamline maintenance processes․

Maintenance Schedule

This section outlines the recommended schedule for routine inspections, lubrication, and part replacements to ensure optimal performance and longevity of the Skyjack SJIII 3219 scissor lift․ Regular checks include hydraulic fluid levels, battery maintenance, and control system functionality․ Lubrication of moving parts should occur every 500 hours, while thorough inspections are required every 1,000 hours․ Detailed schedules and intervals are provided to prevent equipment downtime and ensure safety․ Always refer to the manufacturer’s guidelines for specific procedures and timelines․ Proper adherence to this schedule will help maintain the lift’s operational efficiency and reduce the risk of unexpected failures․

4․1 Routine Maintenance Procedures

Regular maintenance is essential to ensure the Skyjack SJIII 3219 operates safely and efficiently․ Start with a visual inspection of the hydraulic system, checking for leaks or damage․ Clean the control panel and ensure all functions are responsive․ Inspect the battery terminals for corrosion and tighten them if necessary․ Lubricate all moving parts, such as pivot pins and roller bearings, using the recommended grease․ Check the tire pressure and adjust according to the specifications in the manual․ Test the emergency stop function to ensure it operates correctly․ Replace the hydraulic fluid every 2,000 hours or as specified․ Always refer to the manufacturer’s guidelines for specific procedures and timelines․ Proper adherence to these routines will help maintain the lift’s operational efficiency and reduce the risk of unexpected failures․ Ensure all maintenance is performed by trained personnel․

4․2 Lubrication Guidelines

Proper lubrication is critical to ensure smooth operation and longevity of the Skyjack SJIII 3219․ Lubricate all pivot pins, hinges, and moving parts regularly using a high-quality, water-resistant grease․ Apply a thin, even layer to avoid attracting dirt or debris․ For hydraulic components, use the recommended hydraulic fluid specified in the manual․ Check the grease fittings and ensure they are free from contamination․ Lubricate the scissor arm bearings every 500 hours or as needed․ Avoid over-lubrication, as it can lead to premature wear․ Clean old grease from parts before applying new lubricant․ Refer to the exploded diagrams for specific lubrication points․ Always use the manufacturer-recommended products to maintain warranty compliance and optimal performance․ Lubrication should be performed during routine maintenance to prevent corrosion and ensure all mechanical components function smoothly․ Follow the schedule outlined in the manual for best results․

4․3 Inspection Checklist

Regular inspections are essential to maintain the Skyjack SJIII 3219’s performance and safety․ Begin with a visual examination of all components, including hydraulic hoses, wire ropes, and platform rails․ Check for signs of wear, corrosion, or damage․ Inspect the hydraulic fluid level and top it off as needed using the recommended fluid type․ Test all safety features, such as emergency stops and alarm systems, to ensure proper function․ Examine the scissor arms for alignment and smooth operation․ Verify that all bolts and fasteners are tightened to the specified torque values․ Check the condition of tires or tracks for wear and damage․ Lubricate all pivot points and moving parts as outlined in the lubrication guidelines․ Refer to the exploded diagrams for specific inspection points․ Document any issues and address them promptly to prevent downtime and ensure operator safety․ Schedule inspections at intervals recommended in the maintenance schedule․

Troubleshooting

This section helps diagnose and resolve common issues with the Skyjack SJIII 3219, such as hydraulic malfunctions or electrical system errors, using diagnostic techniques and error code references․

5․1 Common Issues and Solutions

Common issues with the Skyjack SJIII 3219 include joystick controller malfunctions, motor brush wear, and hydraulic pressure imbalances․ For joystick issues, check for loose connections or damaged components and replace if necessary․ Motor brushes should be inspected regularly and replaced if worn below the specified limit․ Hydraulic pressure problems can often be resolved by adjusting the system according to the manufacturer’s guidelines․ Always refer to the exploded diagrams and parts listings in this manual for accurate identification and replacement procedures․ If issues persist, consult the Skyjack parts department or authorized service provider for assistance․ Regular maintenance and inspections can prevent many of these problems, ensuring optimal performance and safety․

5․2 Diagnostic Techniques

Diagnosing issues with the Skyjack SJIII 3219 involves a systematic approach to identify and resolve problems efficiently․ Start with a visual inspection of components such as the joystick controller, motor brushes, and hydraulic lines for signs of wear or damage․ Use the exploded diagrams in this manual to locate and identify parts accurately․ For electrical issues, check for loose connections or faulty wiring using multimeter testing․ Hydraulic system diagnostics may require pressure testing to identify imbalances or blockages․ Refer to the troubleshooting guide for common symptoms and potential causes․ If error codes appear, consult the error code reference section for specific meanings and solutions․ Always follow safety precautions when performing diagnostics, and ensure the machine is powered off or in a safe state before beginning inspections․ If unsure, contact the Skyjack parts department or an authorized technician for further assistance․ Regular diagnostics can prevent minor issues from becoming major problems․

5․3 Error Codes and Their Meanings

The Skyjack SJIII 3219 parts manual includes a section dedicated to error codes, which are essential for quickly identifying and addressing issues․ Error codes are displayed on the control panel and correspond to specific system malfunctions․ For example, codes related to hydraulic pressure imbalances or motor faults are common․ Each code is accompanied by a detailed explanation, allowing technicians to pinpoint the problematic component․ The manual provides a comprehensive list of codes, their meanings, and recommended solutions․ Referencing the error code section ensures accurate diagnostics and minimizes downtime․ Always consult the manual or contact Skyjack support for unresolved issues․ Proper understanding of error codes is crucial for maintaining equipment performance and safety․ This section is a vital resource for operators and technicians․

Safety Precautions

Always follow safety guidelines when operating or maintaining the Skyjack SJIII 3219․ Proper training, PPE, and adherence to manual instructions are essential to prevent accidents and ensure safe equipment handling․ Be aware of potential hazards and maintain a clean working environment․

6․1 General Safety Guidelines

Adhere to all safety protocols when operating or servicing the Skyjack SJIII 3219 scissor lift to ensure operator and bystander safety․ Always wear proper personal protective equipment (PPE), including hard hats, safety glasses, and steel-toe boots․ Ensure the equipment is operated on level, stable ground, and never exceed the maximum load capacity․ Conduct pre-operational inspections to verify all components are functioning correctly․ Be aware of overhead obstructions and maintain a safe distance from hazards․ Follow all manufacturer instructions for maintenance and repairs․ Never operate the machine under the influence of drugs or alcohol․ Ensure all operators are properly trained and authorized․ Keep loose clothing and long hair tied back to avoid entanglement․ Always maintain clear communication with coworkers and use hand signals when necessary․ Be prepared for emergencies by having a first aid kit and fire extinguisher nearby․ Regularly review and update safety procedures to comply with industry standards․

6․2 Safe Handling of Parts

Always handle parts for the Skyjack SJIII 3219 with care to prevent damage and ensure safety․ Wear appropriate personal protective equipment (PPE), such as gloves, to protect against sharp edges or heavy components․ Use proper lifting techniques to avoid injury when moving heavy parts․ Ensure parts are stored in a clean, dry environment to prevent corrosion or contamination․ Avoid stacking parts in a way that could cause instability or accidental tipping․ Use tools and equipment specifically designed for the task to minimize the risk of damage or injury․ Never leave loose parts unattended near the machine, as they could pose a tripping hazard․ Follow the manufacturer’s guidelines for handling and storing specialized components, such as hydraulic or electrical parts․ Keep all parts away from open flames or sparks to prevent fire hazards․ Regularly inspect parts for wear or damage before installation․ Properly label and organize parts to ensure they are easily identifiable and accessible․ Adhere to all safety protocols when handling batteries, fluids, or other hazardous materials․ Dispose of waste materials responsibly according to local regulations․ By following these guidelines, you can ensure the integrity of the parts and maintain a safe working environment․

6․3 Emergency Procedures

In case of an emergency involving the Skyjack SJIII 3219, follow these procedures to ensure safety and minimize damage․ Immediately shut off the machine and disconnect the power source if possible․ Evacuate the area and ensure all personnel are at a safe distance․ For hydraulic or electrical system failures, isolate the affected components to prevent further damage․ Contact the Skyjack Parts Department or authorized service provider for assistance․ In the event of a fire, use a fire extinguisher rated for electrical or hydraulic fires, and evacuate the area․ Do not attempt to repair damaged parts without proper training or equipment․ Keep emergency contact information readily available, including the Skyjack Parts Department and local emergency services․ Always refer to the Skyjack SJIII 3219 Parts Manual for specific guidance on handling emergencies related to the equipment․ Regular training on emergency procedures is essential to ensure a prompt and safe response․

Manufacturer Support

For inquiries, contact Skyjack Parts Department at parts@skyjack․com or visit www․skyjack․com․ Warranty support is available for 24 months․ Digital manuals and resources are accessible online for convenient access․

7․1 Contact Information for Skyjack Parts Department

The Skyjack Parts Department is available to assist with inquiries and orders․ You can reach them via email at parts@skyjack․com or by visiting their official website at www․skyjack․com․ For immediate support, contact their customer service team during business hours․ International customers can also reach out to local distributors for region-specific assistance․ Ensure to have your equipment model and serial number ready for efficient service․ Additionally, Skyjack Australia Pty Ltd is located at 4 Coates Place and can be contacted for regional support․ The company is committed to providing prompt and reliable service to maintain your equipment’s performance and longevity․

7․2 Warranty Information

Skyjack warrants each new SJIII Series work platform, including the SJIII 3219, to be free from defective parts and workmanship for a period of 24 months from the date of delivery․ This warranty covers repairs or replacements of defective components, ensuring your equipment operates safely and efficiently․ However, the warranty does not cover normal wear and tear, misuse, or damage caused by improper maintenance․ For detailed terms and conditions, refer to the official Skyjack warranty document provided with your purchase or available on their website․ If you need to file a warranty claim, contact the Skyjack Parts Department with your equipment’s serial number and a detailed description of the issue․ Proper documentation and adherence to warranty guidelines are essential for claim approval․

7․3 Accessing Digital Manuals and Resources

To access digital manuals and resources for the Skyjack SJIII 3219, visit the official Skyjack website at www․skyjack․com․ Here, you can download PDF versions of the parts manual, service manual, and other technical documents․ Use the search function to locate specific resources for your model, such as the SJIII 3219․ Additionally, Skyjack provides exploded diagrams, parts lists, and compatibility charts to aid in maintenance and repairs․ For older models or serial numbers, refer to the website’s archive section․ Ensure you have the correct serial number for accurate document retrieval․ Creating an account may be required for access to certain resources․ This digital repository is designed to support technicians and operators in maintaining and servicing their equipment efficiently․

Categories
Manuals

cessna 172p parts manual

The Cessna 172P parts manual serves as a comprehensive guide for maintenance‚ repairs‚ and upgrades․ It covers essential components‚ including airframe‚ engine‚ avionics‚ and electrical systems‚ ensuring compliance with FAA standards․ This manual is indispensable for mechanics and owners‚ providing detailed diagrams‚ part numbers‚ and repair procedures to maintain the aircraft’s safety and performance․ Regular updates ensure adherence to the latest regulations and manufacturer recommendations․

Overview of the Cessna 172P Aircraft

The Cessna 172P is a widely used single-engine aircraft‚ known for its reliability and durability․ Introduced in 1981‚ it features a Lycoming O-320-D2G engine‚ producing 180 horsepower․ With a maximum gross weight of 2‚550 pounds‚ it offers a cruising speed of 140 knots․ Popular in flight schools and private ownership‚ the 172P is praised for its stability‚ ease of handling‚ and versatility‚ making it an ideal trainer and personal aircraft․ Its enduring popularity underscores its reputation as a dependable workhorse in aviation․

Importance of the Parts Manual for Maintenance and Repairs

The parts manual is crucial for maintaining the Cessna 172P’s airworthiness․ It provides detailed part descriptions‚ diagrams‚ and repair procedures‚ ensuring accurate maintenance․ Mechanics rely on it to identify components‚ order replacements‚ and perform repairs efficiently․ Compliance with FAA regulations is simplified‚ as the manual aligns with approved standards․ Regular updates ensure technicians have the latest information‚ preventing errors and enhancing safety․ Without it‚ maintaining the aircraft’s performance and safety would be significantly more challenging and prone to oversight․

Structure and Organization of the Parts Manual

The Cessna 172P parts manual is logically structured with a table of contents‚ index‚ and detailed sections․ It includes diagrams and part lists‚ ensuring easy navigation and identification of components for efficient maintenance and repairs․

Table of Contents and Index for Easy Navigation

The Cessna 172P parts manual features a detailed table of contents and comprehensive index‚ enabling quick access to specific sections․ Organized by aircraft systems‚ it lists components like airframe‚ engine‚ and avionics․ The index cross-references part numbers and descriptions‚ streamlining searches․ This structure ensures mechanics and owners can swiftly locate information‚ enhancing efficiency in maintenance and repairs while minimizing downtime․ Clear categorization and cross-referencing make the manual user-friendly and essential for effective aircraft management․

Key Sections and Subsections in the Manual

The Cessna 172P parts manual includes dedicated sections for airframe components‚ engine parts‚ avionics‚ and electrical systems․ Subsections detail specific assemblies like wings‚ fuselage‚ landing gear‚ and fuel systems․ Maintenance schedules and troubleshooting guides are prominently featured‚ along with diagrams for visual clarity․ The manual also covers FAA-approved modifications and compliance requirements‚ ensuring users can navigate and utilize the information efficiently for repairs‚ upgrades‚ and routine maintenance‚ making it an indispensable resource for aircraft owners and mechanics․

Airframe Components

The Cessna 172P parts manual details the aircraft’s structural elements‚ including wings‚ fuselage‚ and control surfaces․ It provides specifications for components like rivets‚ bolts‚ and fasteners‚ ensuring durability and safety․

Wing and Fuselage Parts

The Cessna 172P parts manual thoroughly covers wing and fuselage components‚ including spars‚ ribs‚ skin panels‚ and attachment hardware․ Detailed diagrams and part numbers ensure accurate identification and procurement․ Fuselage sections outline frame components‚ door mechanisms‚ and window assemblies․ The manual emphasizes structural integrity‚ providing specifications for inspections and replacements to maintain airworthiness․ Additionally‚ it lists approved materials and tools for repairs‚ ensuring compliance with FAA standards and manufacturer recommendations for long-term durability and safety․

Landing Gear and Brake System Components

The Cessna 172P parts manual details the landing gear and brake system‚ including wheels‚ tires‚ brake pads‚ and hydraulic lines․ It specifies acceptable wear limits and replacement criteria for critical components․ The manual outlines inspection procedures to ensure proper function and safety․ Additionally‚ it provides torque specifications for bolts and nuts‚ as well as guidelines for lubricating moving parts․ Proper maintenance of these components is essential for safe landings and ground operations‚ as outlined in the manual․

Engine and Propeller

The Cessna 172P parts manual covers the Lycoming O-320-D2G engine and McCauley propeller components․ It includes specifications for engine cylinders‚ pistons‚ and rings‚ as well as propeller blades‚ hubs‚ and controls․ Detailed diagrams and part numbers ensure accurate identification and replacement․ Regular maintenance procedures‚ such as oil changes and propeller inspections‚ are also outlined to maintain optimal performance and safety․

Lycoming O-320-D2G Engine Parts

The Lycoming O-320-D2G engine powers the Cessna 172P‚ with detailed parts listed in the manual․ It covers cylinders‚ pistons‚ crankshafts‚ and fuel injection systems․ Critical components like engine mounts and exhaust systems are included‚ along with part numbers and torque specifications․ The manual emphasizes proper maintenance procedures to ensure engine longevity and performance․ Adherence to Lycoming’s service bulletins is stressed for safety and compliance‚ making it an essential resource for mechanics and owners․

Propeller Hub and Blade Components

The Cessna 172P parts manual details the propeller hub and blade components‚ emphasizing their critical role in flight performance․ It includes part numbers for hubs‚ blades‚ and bolts‚ along with torque specifications and maintenance guidelines․ The manual highlights inspection intervals to ensure blade integrity and balance․ Proper replacement and alignment procedures are outlined to maintain optimal propeller efficiency and safety․ Adherence to these guidelines is essential for preventing vibration issues and ensuring reliable engine-propeller interaction during flight operations․

Avionics and Electrical Systems

The Cessna 172P parts manual covers avionics and electrical systems‚ including the Garmin GMA 340 audio panel‚ Bendix/King KY 197 COM‚ and KN 53 NAV radios․ It details electrical power distribution‚ circuit breakers‚ and wiring diagrams‚ ensuring proper system functionality and safety․ Regular inspection and maintenance guidelines are provided to prevent malfunctions and ensure reliable communication and navigation during flight operations․

Garmin GMA 340 Audio Panel Components

The Garmin GMA 340 audio panel in the Cessna 172P is a critical component for pilot communication․ It includes a marker beacon receiver‚ audio amplifiers‚ and a 3D audio processing system․ The manual provides detailed schematics and part lists for the panel’s circuit boards‚ knobs‚ switches‚ and wiring harnesses․ Maintenance procedures outline how to replace faulty components like faders or LEDs‚ ensuring clear audio transmission and reception for safe flight operations․ Upgrading or repairing this system requires adherence to FAA guidelines to maintain certification compliance․

Bendix/King KY 197 COM and KN 53 NAV Radios

The Bendix/King KY 197 COM and KN 53 NAV radios are essential for communication and navigation in the Cessna 172P․ The KY 197 provides clear two-way communication with ATC and other aircraft‚ while the KN 53 offers precise navigation signals․ Both systems include antennas‚ control panels‚ and internal circuitry detailed in the manual․ Regular maintenance involves inspecting antennas‚ checking connections‚ and replacing faulty components․ Compliance with FAA standards ensures reliable performance‚ crucial for safe flight operations and navigation accuracy․

Instruments and Controls

The Cessna 172P features a comprehensive suite of primary flight instruments‚ including altimeter‚ airspeed indicator‚ and heading indicator‚ essential for precise flight monitoring and control operations․

Primary Flight Instruments

The Cessna 172P is equipped with essential primary flight instruments‚ including the altimeter‚ airspeed indicator‚ and heading indicator․ These tools provide critical data for altitude‚ speed‚ and direction‚ ensuring precise flight monitoring․ The turn coordinator and tachometer are also integral‚ offering insights into engine performance and aircraft orientation․ These instruments are strategically placed in the cockpit for easy access‚ enabling pilots to maintain situational awareness and operate the aircraft safely and efficiently under various flight conditions․

Engine Monitoring and Control Systems

The Cessna 172P features a robust engine monitoring system‚ including fuel flow‚ oil pressure‚ and temperature gauges․ These components ensure optimal engine performance and early detection of potential issues․ The Lycoming O-320-D2G engine is equipped with controls for throttle‚ mixture‚ and propeller pitch‚ allowing pilots to manage power settings efficiently․ Real-time data from these systems enables timely interventions‚ ensuring engine longevity and reliability during flight operations․

Hydraulic and Fuel Systems

The Cessna 172P’s hydraulic system supports landing gear and braking‚ while the fuel system includes tanks‚ pumps‚ and valves․ These components ensure efficient fuel distribution and safe landings․

Fuel Tank and Pump Components

The Cessna 172P features two fuel tanks located in the wings‚ each with a capacity of approximately 26․5 gallons․ The fuel pumps ensure consistent flow to the engine‚ maintaining proper pressure and preventing vapor lock․ Regular inspection of fuel tank seals‚ pump operation‚ and fuel lines is crucial for safety and performance․ The parts manual provides detailed specifications and replacement procedures for these components‚ ensuring compliance with FAA standards and manufacturer recommendations․ Proper maintenance of these systems is essential for reliable engine operation during all flight conditions․

Hydraulic System Parts and Accessories

The Cessna 172P’s hydraulic system includes components like reservoirs‚ pumps‚ actuators‚ and valves‚ essential for landing gear and brake operations․ Regular maintenance involves checking fluid levels‚ inspecting hoses‚ and ensuring proper pressure․ The parts manual provides detailed specifications and troubleshooting guidance for hydraulic malfunctions․ Adherence to recommended maintenance schedules ensures reliable system performance‚ critical for safe aircraft operation․ Properly functioning hydraulic systems are vital for controlling landing gear extension and retraction‚ as well as brake operation during takeoff and landing phases․

Maintenance and Inspection Guidelines

Regular maintenance and inspections are crucial for ensuring the Cessna 172P’s airworthiness․ The manual outlines schedules and checklists to identify and address potential issues promptly‚ ensuring safety and compliance with FAA standards․

Recommended Maintenance Schedules

The Cessna 172P parts manual provides detailed maintenance schedules to ensure optimal aircraft performance․ Daily pre-flight checks‚ 50-hour inspections‚ and annual inspections are outlined․ These schedules include tasks like oil changes‚ tire pressure checks‚ and battery maintenance․ Adhering to these intervals helps prevent potential issues and ensures compliance with FAA regulations․ Regular maintenance is critical for extending the aircraft’s lifespan and maintaining safety standards․ By following the manual’s guidelines‚ owners and mechanics can keep the 172P in peak condition for reliable operation․

Inspection Checklists for Critical Components

The Cessna 172P parts manual includes detailed inspection checklists to ensure all critical components are thoroughly examined․ These checklists cover pre-flight‚ 50-hour‚ and annual inspections‚ focusing on airframe integrity‚ control surfaces‚ and landing gear․ Key areas include tire condition‚ brake functionality‚ and hydraulic fluid levels․ Engine components like oil levels‚ filters‚ and propeller blades are also emphasized․ Fuel system inspections ensure no leaks or contamination․ Electrical connections and avionics are checked for proper function․ Adhering to these checklists ensures compliance with FAA regulations and promotes safe‚ reliable aircraft operation․

Troubleshooting Common Issues

The manual provides step-by-step guides for diagnosing engine problems‚ electrical malfunctions‚ and avionics issues․ It includes fault isolation techniques and repair procedures for critical systems‚ ensuring efficient resolution․

Diagnosing Engine Problems

The Lycoming O-320-D2G engine in the Cessna 172P can experience issues like unusual noises‚ rough running‚ or oil leaks․ The manual provides detailed troubleshooting charts to identify root causes‚ such as faulty spark plugs‚ fuel system blockages‚ or worn piston rings․ Technicians are guided to perform compression tests‚ inspect cylinder performance‚ and check fuel flow․ Adherence to Lycoming’s maintenance guidelines ensures accurate diagnoses․ Regular inspections and timely repairs prevent engine failure‚ maintaining safety and performance․ Always consult certified mechanics for complex issues․

Addressing Electrical System Malfunctions

The Cessna 172P parts manual provides detailed guidance for diagnosing electrical system issues‚ such as faulty wiring‚ circuit breakers‚ or avionics malfunctions․ Common problems include flickering lights‚ radio failures‚ or battery drainage․ The manual outlines step-by-step troubleshooting procedures‚ including checking fuses‚ connectors‚ and wiring harnesses․ Technicians are advised to consult the wiring diagrams and electrical system schematics for precise repairs․ Regular inspections and timely replacements of worn components prevent systemic failures․ Always refer to the manual for specific tools and procedures to ensure safe and effective resolutions․

Compliance and Regulations

The Cessna 172P parts manual ensures adherence to FAA standards and regulations․ It outlines approved modifications‚ AD compliance‚ and service bulletins to maintain airworthiness and safety․ Regular updates reflect the latest regulatory requirements‚ ensuring all repairs and upgrades meet federal aviation standards․ Compliance with these guidelines is critical for legal operation and passenger safety․

FAA-Approved Modifications and Upgrades

The Cessna 172P parts manual details FAA-approved modifications‚ such as engine upgrades and avionics installations‚ ensuring compliance with federal aviation standards․ It provides part numbers and instructions for approved upgrades‚ enabling owners to enhance performance while maintaining airworthiness․ The manual also includes service bulletins and AD compliance requirements‚ ensuring all modifications meet safety and regulatory standards․ Regular updates reflect the latest FAA guidelines‚ helping owners keep their aircraft compliant and operational․

AD Compliance and Service Bulletins

The Cessna 172P parts manual emphasizes AD compliance and service bulletins to ensure airworthiness․ It lists mandatory inspections‚ part replacements‚ and documentation required by the FAA․ Service bulletins provide updates for improving safety and performance․ The manual guides owners and mechanics through compliance processes‚ ensuring all modifications meet regulatory standards․ Regular reviews and updates help maintain adherence to the latest directives‚ ensuring the aircraft remains safe and operational․ Compliance with these guidelines is critical for maintaining certification and avoiding operational restrictions․

Safety Considerations

The Cessna 172P parts manual highlights critical safety procedures‚ emergency equipment‚ and fire prevention systems․ Adhering to these guidelines ensures optimal aircraft performance and passenger safety․

Emergency Procedures and Equipment

The Cessna 172P parts manual outlines essential emergency procedures‚ including fire management‚ oxygen system operation‚ and emergency locator transmitter (ELT) activation․ It details critical equipment like fire extinguishers‚ first aid kits‚ and emergency exits․ Proper use of these systems ensures crew and passenger safety during crises․ The manual also provides step-by-step protocols for Mayday communications and post-crash procedures‚ emphasizing preparedness and quick action to mitigate risks effectively․

Fire Prevention and Management Systems

The Cessna 172P parts manual emphasizes fire prevention through proper system inspections and maintenance․ It details fire extinguisher locations and usage procedures‚ along with strategies to isolate fuel and electrical systems during emergencies․ The manual also outlines inspection schedules for fire-related components to ensure functionality․ Compliance with FAA regulations is highlighted to prevent and manage fire risks effectively‚ ensuring the aircraft remains safe for operation under all conditions․

Tools and Resources

The Cessna 172P parts manual provides essential tools and resources for maintenance‚ including diagnostic equipment and repair guides․ Access Cessna Dealer support for specialized assistance․

Specialized Tools for Cessna 172P Maintenance

The Cessna 172P parts manual highlights the importance of using specialized tools for efficient and safe maintenance․ These tools include diagnostic equipment‚ torque wrenches‚ and aviation-specific fasteners․ The manual emphasizes the need for precision instruments to handle the aircraft’s complex systems‚ such as the Lycoming O-320-D2G engine and Garmin avionics․ Accessing Cessna Dealer support ensures mechanics have the correct tools and resources for compliance with FAA standards․ Regular updates to the manual provide the latest tool recommendations‚ ensuring optimal aircraft performance and safety․

Online Resources and Cessna Dealer Support

The Cessna 172P parts manual directs users to utilize online resources for updated information and technical support․ Cessna Dealers provide comprehensive assistance‚ including warranty services and technical guidance․ Digital platforms offer downloadable manuals‚ service bulletins‚ and interactive tools․ Additionally‚ forums and communities share maintenance tips and troubleshooting advice; Staying connected with Cessna’s official support network ensures access to the latest updates‚ enhancing maintenance efficiency and compliance with FAA regulations․ These resources are essential for keeping the aircraft airworthy and optimizing its performance․

The Cessna 172P parts manual is an essential resource for effective maintenance and repairs․ It ensures compliance with FAA standards‚ providing detailed guidance for safe and efficient aircraft operation․ Regular updates and Cessna Dealer support enhance its utility‚ making it indispensable for maintaining airworthiness and performance․

Final Thoughts on Using the Parts Manual Effectively

Effectively using the Cessna 172P parts manual requires thorough understanding and adherence to its guidelines․ Regularly reviewing updates ensures compliance with FAA standards and manufacturer recommendations․ Mechanics and owners should familiarize themselves with key sections‚ such as airframe components‚ engine specifications‚ and avionics details․ Proper use of this manual enhances safety‚ maintains performance‚ and extends the aircraft’s lifespan․ It is a vital tool for anyone involved in the maintenance and operation of the Cessna 172P․

Importance of Staying Updated with the Latest Information

Staying updated with the latest information ensures compliance with safety standards and regulatory requirements․ Regular updates to the Cessna 172P parts manual provide critical insights into new parts‚ maintenance techniques‚ and troubleshooting methods․ This helps in identifying and addressing potential issues before they escalate․ Updated manuals also reflect FAA-approved modifications and service bulletins‚ ensuring the aircraft remains airworthy․ Accessing the latest resources through Cessna dealers or online platforms is essential for maintaining optimal performance and safety․

Categories
Manuals

dewalt 3400 psi pressure washer instruction manual

Product Overview

The DeWalt 3400 PSI pressure washer is a gas-powered‚ heavy-duty cleaning solution designed for professional and residential use‚ delivering 2.5 GPM for efficient‚ tough cleaning tasks.

1.1 Key Features of the DeWalt 3400 PSI Pressure Washer

The DeWalt 3400 PSI pressure washer delivers powerful cleaning with 2.5 GPM flow rate‚ ideal for heavy-duty tasks. It features a professional-grade engine‚ durable pump‚ and high-pressure hose. The spray gun includes multiple nozzles for versatility. Designed for efficiency‚ it offers a reliable performance for tough cleaning jobs; Safety features include thermal protection and a sturdy frame. Always refer to the instruction manual for proper usage and maintenance to ensure optimal performance and longevity of the equipment.

1.2 Design and Build Quality

The DeWalt 3400 PSI pressure washer boasts a robust design with a durable steel frame and high-quality components. Its professional-grade engine and pump ensure reliable performance. The unit is built with heavy-duty materials for longevity and withstands demanding conditions. Ergonomic handles and wheels enhance portability‚ making it easy to maneuver. The compact design optimizes storage and transport. The overall construction reflects DeWalt’s commitment to durability and reliability‚ ensuring years of efficient service when properly maintained according to the instruction manual.

Safety Instructions

Always wear protective gear‚ including gloves and eyewear. Avoid unsafe surfaces and keep children away. Never modify the unit or bypass safety features. Follow all guidelines.

2.1 General Safety Precautions

Always wear protective eyewear‚ gloves‚ and sturdy footwear when operating the pressure washer. Ensure the area is clear of obstacles and keep children and pets away; Avoid using the device on flammable materials or near open flames. Never modify the unit or tamper with safety features. Maintain a safe distance from electrical sources to prevent shock. Use the widest fan spray nozzle (40º) for surfaces like tires to avoid damage. Keep the spray wand at least 8 inches away from surfaces to prevent wear or injury. Read the manual thoroughly before operation.

2.2 Operating Safety Guidelines

Operate the DeWalt 3400 PSI pressure washer on a firm‚ level surface to prevent tipping. Always start the engine with the spray wand in a neutral position and the safety lock engaged. Avoid spraying at windows‚ electrical components‚ or people. Use the correct nozzle for the task to prevent damage or injury. Keep the hose away from hot surfaces or sharp edges. Ensure the pressure washer is properly ventilated to avoid carbon monoxide buildup. Follow the recommended starting and stopping procedures outlined in the manual.

Technical Specifications

The DeWalt 3400 PSI pressure washer features a gas-powered engine‚ 2.5 GPM flow rate‚ and cold water operation‚ ideal for heavy-duty cleaning tasks.

3.1 Pressure and Flow Rate Details

The DeWalt 3400 PSI pressure washer delivers a maximum pressure of 3400 pounds per square inch (PSI) and a flow rate of 2.5 gallons per minute (GPM). This combination ensures efficient cleaning power for tough tasks. The unit is designed for cold water operation‚ making it suitable for various applications. The pressure and flow rate are optimized for heavy-duty cleaning‚ providing consistent performance across different surfaces. Proper use of these specifications ensures effective and safe operation.

3.2 Engine and Pump Information

The DeWalt 3400 PSI pressure washer features a powerful gas-powered engine designed for high performance and durability. The engine operates efficiently‚ providing consistent power to the pump. The pump is constructed with durable materials‚ such as stainless steel pistons‚ to withstand the high-pressure demands. This design ensures reliable operation and long-lasting performance. The engine and pump combination is optimized for heavy-duty cleaning tasks‚ delivering the necessary power and flow rate for effective results. Proper maintenance of these components is essential for sustained functionality.

Assembly and Initial Setup

Unpack and inventory all components. Follow the step-by-step assembly guide. Ensure all parts are included and correctly assembled. Refer to the manual for proper setup.

4.1 Unpacking and Inventory

Carefully unpack the DeWalt 3400 PSI pressure washer. Ensure all components‚ including the engine‚ pump‚ spray wand‚ nozzles‚ and hose‚ are included. Review the manual for a detailed inventory list. Check for any damage or missing parts. This step ensures proper assembly and operation. If any items are damaged or missing‚ contact DeWalt customer service immediately. Proper inventory is crucial for a smooth setup and operation.

4.2 Step-by-Step Assembly Guide

Begin by attaching the handle to the frame using the provided bolts. Next‚ connect the high-pressure hose to the pump and spray wand. Ensure all connections are secure to prevent leaks. Install the spray wand into the handle and attach the desired nozzle. Refer to the manual for specific torque values. Finally‚ connect the fuel line to the engine and ensure all safety guards are in place. Double-check all connections for tightness before operation. Consult the manual for detailed diagrams and instructions.

Operating Instructions

Pull the choke‚ squeeze the trigger to start the engine‚ and adjust the choke as needed. Use the spray gun with the appropriate nozzle for your task. Always maintain a safe distance from surfaces to avoid damage.

5.1 Starting and Stopping the Pressure Washer

To start‚ prime the engine by squeezing the primer bulb 2-3 times until firm. Pull the choke knob out‚ then pull the starter cord firmly until the engine starts. Push the choke knob back in once the engine runs smoothly. For stopping‚ turn off the engine switch and allow it to cool slightly. Always relieve pressure in the system by squeezing the spray gun trigger with the pump off. Follow these steps to ensure safe and efficient operation.

5.2 Adjusting Pressure and Using Nozzles

To adjust pressure‚ use the regulator knob on the pump to set the desired PSI for your cleaning task. For nozzle selection‚ choose from 0°‚ 15°‚ 25°‚ or 40° spray tips based on surface type and dirt severity. Always start with a lower pressure setting and increase as needed. Use the 40° nozzle for delicate surfaces and the 0° for heavy-duty cleaning. Replace nozzles by pulling the current one out and snapping the new one into place securely. This ensures optimal performance and safety.

Maintenance and Troubleshooting

Regularly check oil levels‚ inspect hoses for damage‚ and clean filters to ensure optimal performance. Refer to the manual for troubleshooting common issues like low pressure or engine problems.

6.1 Regular Maintenance Tasks

Regular maintenance is crucial to extend the life of your DeWalt 3400 PSI pressure washer. Check the oil level before each use and change it every 50 hours. Inspect and clean the air filter monthly. Replace worn or damaged hoses and seals promptly. Clean the fuel tank and ensure proper ventilation. Lubricate moving parts annually. Store the unit in a dry‚ cool place during off-seasons. Refer to the manual for detailed maintenance schedules and procedures.

6.2 Common Issues and Solutions

Common issues with the DeWalt 3400 PSI pressure washer include low pressure output‚ engine not starting‚ or leaking hoses. For low pressure‚ check for clogged nozzles or kinked hoses. If the engine fails to start‚ ensure proper fuel levels and choke positioning. Leaks can often be fixed by replacing worn seals. Refer to the troubleshooting guide in the manual for detailed solutions. Regular maintenance can prevent many of these issues; Always follow safety guidelines when addressing repairs.

Accessories and Attachments

Essential accessories include various nozzles‚ high-pressure hoses‚ and brushes for diverse cleaning tasks. Additional attachments like rotary brushes enhance efficiency for tough surfaces and large areas.

7.1 Recommended Accessories

For optimal performance‚ consider essential accessories like 40°‚ 25°‚ and 0° nozzles for various cleaning tasks. A high-pressure hose extension and rotary brush are ideal for large surfaces. Additionally‚ a variable-pressure brush and detergent injector enhance cleaning efficiency. These accessories are designed to be compatible with the DeWalt 3400 PSI pressure washer‚ ensuring versatility and effectiveness for different cleaning scenarios.

A telescoping wand and safety gear (gloves‚ goggles) are also recommended. Storage solutions like a cart or cover protect your equipment and keep it organized for future use.

7.2 Using Additional Attachments

Additional attachments enhance the versatility of the DeWalt 3400 PSI pressure washer. Use rotary brushes for tough surfaces like concrete‚ while variable-pressure nozzles (40°‚ 25°‚ 0°) are ideal for delicate or heavy-duty cleaning. The detergent injector allows for precise chemical application‚ improving cleaning efficiency. Always consult the instruction manual for compatibility and proper installation of attachments to ensure safety and optimal performance. Regularly inspect attachments for wear and tear to maintain effectiveness.

When using attachments like telescoping wands or extension hoses‚ ensure they are securely connected to avoid leaks or loss of pressure. Follow safety guidelines‚ such as maintaining a safe distance from surfaces when using high-pressure nozzles.

Environmental and Safety Precautions

Always handle the DeWalt 3400 PSI pressure washer with care to minimize environmental impact. Dispose of cleaning solutions and wash water responsibly‚ avoiding storm drains. Ensure proper storage in a dry‚ well-ventilated area to prevent damage and extend equipment life. Follow all safety guidelines to protect yourself‚ others‚ and the environment from potential hazards associated with high-pressure cleaning.

8.1 Proper Storage and Handling

Store the DeWalt 3400 PSI pressure washer in a dry‚ well-ventilated area to prevent damage. Keep it upright on a flat surface to avoid leakage; Clean the machine thoroughly before storage to remove dirt and debris. Drain the fuel tank or use a fuel stabilizer if storing for extended periods. Avoid leaving detergent or cleaning solutions in the tank. Cover the unit with a tarp or protective cover to shield it from dust and moisture. Handle the pressure washer with care to prevent physical damage.

8.2 Disposal and Recycling Guidelines

Dispose of the DeWalt 3400 PSI pressure washer responsibly. Separate components like the engine‚ pump‚ and frame for recycling. Check local regulations for hazardous waste collection‚ as fuel and oil require special handling. Do not dispose of the unit in regular trash. Participate in DeWalt’s recycling programs or partner facilities for proper handling. Recycle metal and plastic parts to minimize environmental impact. Ensure all fluids are drained and disposed of according to local environmental guidelines before recycling or disposal.

Warranty and Customer Support

The DeWalt 3400 PSI pressure washer comes with a comprehensive warranty covering defects in materials and workmanship. Contact DeWalt customer service for assistance or warranty claims.

9.1 Warranty Terms and Conditions

The DeWalt 3400 PSI pressure washer is backed by a limited warranty covering defects in materials and workmanship for a specific period. The warranty duration varies by component‚ with the engine and pump typically covered for up to 2 years‚ while other parts may have a 1-year coverage. Registration and proper maintenance are required to maintain warranty validity. Repairs or replacements are provided free of charge for warranted defects. For full details and conditions‚ refer to the official DeWalt warranty statement or contact customer support.

9.2 Contacting DeWalt Customer Service

For assistance with the DeWalt 3400 PSI pressure washer‚ contact customer service via phone‚ email‚ or through the official DeWalt website. Support is available Monday-Friday‚ 8 AM-5 PM EST. Visit the DeWalt website for contact details‚ troubleshooting guides‚ and FAQs. Ensure to have your model number and serial number ready for efficient support. Additionally‚ the instruction manual includes specific contact information for warranty-related inquiries and technical assistance.

The DeWalt 3400 PSI pressure washer is a powerful‚ efficient tool for heavy-duty cleaning tasks‚ ensuring optimal performance when used with proper maintenance and safety guidelines.

10.1 Final Tips for Optimal Performance

For the best results with your DeWalt 3400 PSI pressure washer‚ always follow the manual’s guidelines. Regularly check and maintain the pump‚ engine‚ and hoses. Use the correct nozzles for your cleaning tasks to ensure efficiency and prevent damage. Store the unit in a dry‚ cool place when not in use. Adhere to safety precautions to avoid accidents. Proper maintenance and adherence to instructions will extend the lifespan and performance of your pressure washer.

Further Reading

For in-depth guides‚ visit the official DeWalt website or explore instructional videos on YouTube. Community forums also offer valuable insights and troubleshooting tips from experienced users.

11.1 Additional Resources

For further assistance‚ refer to the official DeWalt website or download the full DP3400 Pressure Washer manual for detailed instructions. Explore YouTube tutorials or forums like Reddit for user experiences and troubleshooting tips. Visit hardware stores or authorized dealers for hands-on demos or expert advice. Access the DeWalt customer support portal for direct assistance or parts inquiries. These resources ensure optimal performance and safety when using your pressure washer.

Categories
Manuals

troy bilt super bronco tiller owners manual

Welcome to the Troy-Bilt Super Bronco Tiller Owner’s Manual! This guide provides essential information for safe operation, assembly, and maintenance of your tiller.

1.1 Overview of the Manual’s Purpose and Structure

This manual is designed to help you safely and effectively operate your Troy-Bilt Super Bronco Tiller. It covers essential topics like assembly, operation, maintenance, and troubleshooting. The guide is structured to ensure easy navigation, with sections dedicated to key features, safety guidelines, and warranty information. By following this manual, you can maximize your tiller’s performance and extend its lifespan.

1.2 Importance of Reading the Manual for Safe and Effective Use

Reading this manual is crucial for safe and effective use of your Troy-Bilt Super Bronco Tiller. It provides essential safety precautions, operating instructions, and maintenance tips. By understanding the contents, you can avoid accidents, ensure proper functionality, and prolong the life of your equipment. Always refer to this guide before operating or maintaining your tiller to guarantee optimal performance and safety.

Key Features of the Troy-Bilt Super Bronco Tiller

The Troy-Bilt Super Bronco Tiller is equipped with a powerful engine, durable tines, and adjustable settings, ensuring versatility and efficiency in tilling various soil types.

2.1 Engine and Transmission Specifications

The Troy-Bilt Super Bronco Tiller features a robust engine designed for consistent power delivery, paired with a reliable transmission system. The engine offers ample horsepower to handle tough soil conditions, while the gear-driven transmission ensures smooth control and efficient tilling performance. These specifications make the tiller suitable for both small and large-scale gardening tasks, providing durability and reliability for years of use.

2.2 Tine Design and Tilling Capacity

The Troy-Bilt Super Bronco Tiller is equipped with durable, heavy-duty tines that efficiently break up soil. Its robust design allows for a wide tilling capacity, making it ideal for preparing large garden areas. The tines are constructed to handle tough soil conditions, ensuring effective and consistent tilling performance. This feature enhances productivity, making it a reliable choice for gardeners seeking to cultivate soil with ease and precision.

2.3 Adjustable Settings for Versatility

The Troy-Bilt Super Bronco Tiller features adjustable settings to cater to various tilling needs. The depth adjustment allows users to customize tilling depth for different soil conditions. Additionally, the handlebar height can be adjusted for optimal comfort and control. These versatile settings ensure the tiller can adapt to different garden sizes and user preferences, making it a flexible tool for diverse gardening tasks and soil types.

Safety Guidelines for Operating the Tiller

Always wear protective gear, ensure the area is clear of obstacles, and avoid leaving the engine running unattended. Follow all safety precautions.

3.1 Pre-Operation Safety Checks

Before starting, inspect the tiller for damage or wear, ensuring all parts are secure. Check oil levels, sharpness of tines, and ensure the area is clear of debris. Verify proper function of controls and safety features. Always refer to the manual for specific guidelines to ensure safe and effective operation of your Troy-Bilt Super Bronco Tiller.

3.2 Safety Precautions During Operation

Always wear protective gear, including gloves and safety glasses, when operating the tiller. Keep feet away from tines and avoid overreaching. Never leave the tiller unattended while the engine is running. Stay alert and avoid distractions. Ensure the area is clear of obstacles and bystanders. If you must stop, shut off the engine and engage the brake. Follow all safety guidelines to minimize risks and ensure safe operation.

3.3 Post-Operation Safety Measures

After use, turn off the engine and allow the tiller to cool. Engage the parking brake and ensure all moving parts have stopped. Store the tiller in a dry, secure location out of reach of children. Regularly inspect for damage or wear. Properly dispose of any waste materials generated during use. Following these steps ensures safety and prolongs the tiller’s lifespan. Always refer to the manual for specific storage guidelines.

Assembly and Initial Setup

This section guides you through unpacking, inventorying parts, and assembling your Troy-Bilt Super Bronco Tiller. Follow step-by-step instructions for a successful initial setup.

4.1 Unpacking and Inventory of Parts

Carefully unpack the tiller and all accessories from the box. Verify the completeness of the shipment by checking against the provided parts list. Inspect each component for damage or defects. Key items include the tine assembly, handlebars, and engine components. Organize parts in a clean, dry workspace to ensure efficient assembly. Refer to the parts diagram for identification. Contact customer support immediately if any parts are missing or damaged.

4.2 Step-by-Step Assembly Instructions

Begin by attaching the handlebars to the main frame using the provided bolts. Ensure all connections are secure and tightened properly. Next, install the tine assembly according to the diagram, making sure it aligns correctly with the transmission. Attach the wheels and adjust the height settings as needed. Connect the throttle and control cables to the engine, ensuring smooth operation. Finally, double-check all bolts and connections for stability and safety before initial use.

4.3 Initial Test Run of the Tiller

After assembly, perform an initial test run to ensure proper function. Start the engine in an open area, keeping feet away from the tines. Check that the tines rotate smoothly and the controls respond correctly. Test forward and reverse gears, and adjust the depth settings if necessary. Ensure all bolts and connections are secure before extended use. This step confirms readiness for safe and effective tilling.

Operating the Troy-Bilt Super Bronco Tiller

Master the operation of your tiller with this section, covering starting, navigating, and controlling the machine for optimal tilling performance and garden care.

5.1 Starting and Stopping the Engine

To start the engine, ensure the tiller is on level ground. Prime the engine as instructed, then move the choke to the “start” position. Pull the starter rope firmly until the engine roars to life. For stopping, allow the engine to idle for a few seconds before turning it off. Always keep feet away from tines during operation and avoid carrying the machine while the engine is running for safety. Consult the manual for detailed startup and shutdown procedures.

5.2 Navigating and Controlling the Tiller

To navigate and control the tiller, grip the handles firmly and maintain balance. Use the directional controls to guide the machine in the desired path. Adjust your speed according to soil conditions and tilling depth. Keep your feet at a safe distance from the tines and avoid sudden movements. Ensure the area is clear of obstacles to maintain smooth operation and avoid accidents. Practice in an open space to build familiarity with the controls.

5.3 Tips for Effective Tilling

For effective tilling, start by loosening the soil with shallow passes before deep tilling. Maintain consistent speed to ensure uniform soil preparation. Avoid tilling when the soil is too wet or dry, as this can damage the machine or soil structure. Use the adjustable depth settings to tailor tilling depth to your needs. Regularly inspect and clean the tines to prevent clogging. Keep the area free of debris to achieve optimal results.

Maintenance and Upkeep

Regular maintenance ensures optimal performance and extends the life of your Troy-Bilt Super Bronco Tiller. Follow the recommended schedule for lubrication and inspections. Proper storage during off-season is essential to prevent damage and ensure longevity. Always refer to the manual for specific care instructions tailored to your model.

6.1 Regular Maintenance Schedule

A regular maintenance schedule is crucial for the Troy-Bilt Super Bronco Tiller’s longevity. Check the engine oil daily and change it every 50 hours of use. Inspect and clean the air filter monthly, replacing it every 100 hours. Sharpen the tines seasonally and grease the gear drive quarterly. Ensure all bolts and screws are tightened before each use. Keep the tiller clean and store it in a dry place during the off-season. Regular lubrication of moving parts is essential for smooth operation. Follow the manufacturer’s guidelines to maintain performance and prevent wear.

6.2 Lubrication and Oil Change Guidelines

Regular lubrication and oil changes are vital for the Troy-Bilt Super Bronco Tiller’s performance and longevity. Check the engine oil level before each use and change it every 50 hours of operation. Use the recommended oil type for optimal performance. Replace the oil filter during each change. Lubricate all moving parts, such as gears and tines, to prevent wear. Refer to the manual for specific intervals and guidelines to ensure proper maintenance. Neglecting these steps can lead to premature wear and potential engine damage.

6.3 Storage Tips for Off-Season

Proper off-season storage ensures your Troy-Bilt Super Bronco Tiller remains in excellent condition. Clean the tiller thoroughly, removing dirt and debris. Drain the fuel tank or stabilize the fuel to prevent spoilage. Apply rust-inhibiting oil to metal parts and store in a dry, protected area. Avoid exposure to moisture and extreme temperatures. Refer to the manual for specific storage recommendations to maintain performance and longevity during the off-season.

Troubleshooting Common Issues

Identify and resolve issues with your Troy-Bilt Super Bronco Tiller using this section. Address engine problems, tine malfunctions, and transmission issues with practical solutions and diagnostics.

7.1 Diagnosing Engine Problems

If your Troy-Bilt Super Bronco Tiller’s engine isn’t starting or running smoothly, check for common issues like insufficient fuel, a clogged air filter, or a faulty spark plug. Ensure the fuel cap is venting properly and the choke is functioning correctly. If the engine stalls or makes unusual noises, inspect for loose connections or debris in the carburetor. Refer to the manual for specific diagnostic steps and solutions to restore optimal performance.

7.2 Addressing Tine Malfunction

If the tines on your Troy-Bilt Super Bronco Tiller are not rotating or are damaged, first ensure they are properly engaged and free from debris. Check for worn or bent tines and replace them if necessary. Lubricate the tine shaft regularly to prevent rust and friction. If the issue persists, inspect the drive belt for wear or misalignment and adjust or replace it as needed to restore tilling efficiency.

7.3 Solving Transmission or Gear Issues

If your Troy-Bilt Super Bronco Tiller experiences transmission or gear problems, start by checking for debris or blockages in the gear system. Ensure all components are properly lubricated to reduce friction. If gears are misaligned or worn, adjust or replace them as needed. For persistent issues, consult a professional or refer to the warranty for covered repairs to maintain optimal performance and extend the tiller’s lifespan.

Environmental Considerations

This section emphasizes eco-friendly practices when using your Troy-Bilt Super Bronco Tiller. It covers proper waste disposal and sustainable gardening practices to minimize environmental impact.

8.1 Eco-Friendly Operating Practices

To promote sustainability, use the Troy-Bilt Super Bronco Tiller responsibly. Always use the recommended fuel to minimize emissions and ensure proper engine maintenance to prevent leaks. Optimize tilling depth to reduce fuel consumption and avoid over-tilling, which can harm soil health. Dispose of waste materials like oil and filters responsibly, following local environmental guidelines. Regularly check for fluid leaks to prevent contamination. By adhering to these practices, you contribute to a greener environment while maintaining your tiller’s efficiency.

8.2 Proper Disposal of Waste Materials

Properly dispose of waste materials from your Troy-Bilt Super Bronco Tiller by following local regulations. Recycle metal and plastic parts when possible. Dispose of hazardous materials like oil, filters, and batteries at designated facilities. Avoid draining fluids into the ground or waterways. Keep packaging materials separate for recycling. Always check with local authorities for specific guidelines on waste disposal to ensure environmental protection and compliance with community standards.

Warranty and Customer Support

Your Troy-Bilt Super Bronco Tiller is backed by a comprehensive warranty. Contact customer support for assistance with repairs, parts, or general inquiries. Visit their official website for details.

9.1 Understanding the Warranty Coverage

The Troy-Bilt Super Bronco Tiller is covered under a limited lifetime warranty for rear-tine tillers. This warranty protects against defects in materials and workmanship for the tiller’s lifetime. Coverage includes repairs or replacements at no cost, ensuring your investment remains protected. For details, refer to the official warranty document or contact Troy-Bilt customer service. Proper registration and maintenance are required to uphold warranty validity.

9.2 Contacting Troy-Bilt Customer Service

For assistance with your Troy-Bilt Super Bronco Tiller, visit the official Troy-Bilt website or call their customer service hotline. You can also reach them via email for inquiries or support. Their team provides troubleshooting, repair guidance, and information on parts or warranty claims. Ensure to have your model number ready for efficient service. Visit their website to access resources like manuals, parts diagrams, and repair guides.

Parts List and Diagrams

This section provides a detailed list and diagrams of all components for the Troy-Bilt Super Bronco Tiller, ensuring easy identification for maintenance and repairs.

10.1 Identifying Key Components

This section helps you identify the essential parts of your Troy-Bilt Super Bronco Tiller, such as the engine, tines, gear system, and controls. Refer to the diagrams provided to locate each component and understand its function. Proper identification ensures effective maintenance and repairs. Use the parts list to cross-reference and verify the condition of each part before and after assembly. This guide enhances your ability to troubleshoot and maintain your tiller efficiently.

10.2 Ordering Replacement Parts

To order replacement parts for your Troy-Bilt Super Bronco Tiller, refer to the parts list and diagrams in this manual. Identify the part number and description, then contact an authorized Troy-Bilt dealer or visit their official website. Ensure to use genuine parts to maintain warranty coverage and performance. For assistance, contact Troy-Bilt customer support using the information provided in the manual. Proper replacement parts ensure optimal functionality and safety.

Additional Resources

Explore online manuals, video tutorials, and guides for maintenance and repair of your Troy-Bilt Super Bronco Tiller on the official Troy-Bilt website and support channels.

11.1 Online Manuals and Guides

Access comprehensive online manuals and guides for your Troy-Bilt Super Bronco Tiller on the official Troy-Bilt website. Download free PDF versions of the operator’s manual, parts diagrams, and troubleshooting guides. Interactive resources, such as video tutorials, provide step-by-step instructions for maintenance, repair, and operation. These materials are designed to help you maximize your tiller’s performance and ensure longevity. Visit the Troy-Bilt support page for direct links to these valuable resources.

11.2 Video Tutorials for Maintenance and Repair

Enhance your understanding of the Troy-Bilt Super Bronco Tiller with official video tutorials available on the Troy-Bilt YouTube channel and website. These tutorials cover essential maintenance tasks, such as oil changes, tine replacement, and troubleshooting common issues. Step-by-step demonstrations ensure clarity and confidence in performing repairs. Perfect for DIY enthusiasts, these videos complement the manual, providing visual guidance for optimal performance and longevity of your tiller.

The Troy-Bilt Super Bronco Tiller Owner’s Manual provides comprehensive guidance for safe and effective use. Adhere to the outlined instructions to ensure optimal performance and longevity.

12.1 Summary of Key Takeaways

Proper assembly, operation, and maintenance are crucial for the Troy-Bilt Super Bronco Tiller’s performance. Always follow safety guidelines, perform regular maintenance, and troubleshoot issues promptly. Environmental practices and warranty details ensure sustainable and protected use. Consult the manual for parts diagrams and additional resources to maximize your tiller’s efficiency and longevity. By adhering to these guidelines, you’ll enjoy reliable and effective tilling for years to come.

12.2 Encouragement for Proper Usage and Maintenance

Congratulations on acquiring the Troy-Bilt Super Bronco Tiller! By following this manual’s guidelines, you’ll ensure optimal performance, safety, and longevity of your equipment. Regular maintenance and proper usage not only enhance efficiency but also protect the environment. Stay proactive with upkeep and explore additional resources like online guides for troubleshooting. With dedication, your tiller will remain a reliable gardening companion for years to come. Happy tilling!

Categories
Manuals

accu-chek inform ii manual

The Accu-Chek Inform II is a state-of-the-art blood glucose monitoring system designed for multiple patient use, ensuring accurate and reliable results with ease of operation.

1.1 Overview of the Accu-Chek Inform II Blood Glucose Monitoring System

The Accu-Chek Inform II is a comprehensive blood glucose monitoring system designed for use in professional healthcare settings, offering precise and reliable results. It combines advanced technology with user-friendly design to streamline glucose testing for multiple patients. The system includes a meter, test strips, and an accessory kit, ensuring all components work seamlessly together. Its intuitive interface and FastCheck technology enable quick and accurate readings. The system also supports data management and connectivity, making it ideal for clinical environments. Proper storage of test strips between 4°C and 30°C is essential for optimal performance. This system is a trusted tool for diabetes management in healthcare facilities.

1.2 Key Features and Benefits of the Accu-Chek Inform II

The Accu-Chek Inform II offers advanced technology for accurate blood glucose monitoring, designed for healthcare professionals; Its key features include fast and precise test results, compatibility with multiple patients, and seamless connectivity for data transfer. The system supports WLAN connectivity, enabling efficient data management and analysis. It also includes an intuitive interface for easy navigation and a robust design for durability in clinical environments. The meter performs comprehensive system checks to ensure reliability, and its test strips are designed for optimal performance when stored properly between 4°C and 30°C. These features make the Accu-Chek Inform II a reliable and efficient solution for diabetes management in healthcare settings.

System Components and Accessories

The Accu-Chek Inform II system includes a lightweight, portable meter, test strips, and an accessory kit containing a carrying case, ensuring convenience and organization.

2.1 Meter Description and Serial Number Identification

The Accu-Chek Inform II meter is a lightweight, portable device designed for near-patient testing, offering user-friendly functionality for blood glucose monitoring. Its compact design ensures ease of use in clinical settings. The serial number, essential for identification and support, is located on the back of the meter or inside the battery compartment. This unique identifier helps in tracking and verifying the device, ensuring compliance with regulatory standards. The meter is compatible with specific test strips and accessories, making it a reliable tool for accurate blood glucose measurement. For detailed specifications, refer to the operator’s manual or visit Roche Diagnostics’ official website.

2.2 Test Strips and Their Proper Storage Conditions

The Accu-Chek Inform II test strips are specifically designed for accurate blood glucose measurement with the meter. Proper storage is crucial to ensure their performance and reliability. Store test strips in their original vial, tightly sealed, and at temperatures between 4°C and 30°C (39°F to 86°F). Avoid exposing them to extreme conditions, such as direct sunlight or moisture. The relative humidity should not exceed 80%. Always check the expiration date on the vial before use and avoid using expired strips. For optimal results, use test strips within the meter’s specified time frame after opening the vial. Improper storage may affect the accuracy of test results.

2.3 Accessory Kit and Optional Components

The Accu-Chek Inform II Accessory Kit includes a storage container for the meter and its components, ensuring organization and portability. Additionally, the kit may contain a Code Key Reader, used for quick and easy code entry, enhancing efficiency. Optional components like lancets and lancing devices are available to complement the system, providing a comprehensive solution for blood glucose monitoring. These accessories are designed to work seamlessly with the meter, ensuring accurate and reliable results. Always verify compatibility and authenticity of optional components to maintain system performance and avoid potential issues. Proper use of these accessories is detailed in the user manual for optimal functionality.

Installation and Setup

The Accu-Chek Inform II requires initial setup, including powering on the meter and connecting to WLAN for data transfer. Software installation ensures system compatibility and functionality.

3.1 Initial Setup and Powering On the Meter

Begin by inserting the battery into the meter, ensuring it is securely placed to power on the device. Press the Power On/Off button to activate the system. The meter will perform a self-test, confirming its readiness for use. Navigate through the menu to set the date, time, and unit of measure. Ensure the meter is properly configured for your location and language preferences. Before conducting any tests, verify that all components, including the test strips, are within their expiry dates and stored correctly. Proper initial setup ensures accurate and reliable performance of the Accu-Chek Inform II system.

3.2 Connecting the Meter to WLAN for Data Transfer

To connect the Accu-Chek Inform II meter to a WLAN network, navigate to the WLAN menu using the device’s interface. Select your network from the available options and enter the password when prompted. Ensure the meter is in range of the router for a stable connection. Once connected, the meter will confirm the network status. For troubleshooting, refer to the manual or the addendum available at https://diagnostics.roche.com. This connection enables seamless data transfer to compatible systems, enhancing patient monitoring and record-keeping.

3.3 Installing Software and Drivers for System Compatibility

To ensure compatibility, download the latest software and drivers from Roche Diagnostics’ official website at https://diagnostics.roche.com. Follow the installation instructions provided in the manual or on the website. Ensure your system meets the minimum requirements, including operating system version and hardware specifications. After installation, restart the device and reconnect it to the Accu-Chek Inform II meter. Regular software updates are essential for optimal performance and security. Refer to the manual for detailed steps or contact Roche support for assistance with installation or troubleshooting.

Operating the Accu-Chek Inform II System

The Accu-Chek Inform II system provides a user-friendly interface for conducting blood glucose tests, managing multiple patient profiles, and delivering accurate results efficiently.

4.1 Preparing for a Patient Test

Preparing for a patient test with the Accu-Chek Inform II involves several key steps to ensure accuracy and safety. First, check the expiry date of the test strips and store them between 4°C and 30°C (39°F ౼ 86°F) with humidity levels between 10-80%. Next, power on the meter by pressing the Power On/Off Button. Ensure the meter is properly connected to the Base Unit if using one. Before testing, wash hands and don personal protective equipment (PPE) such as gloves and gowns. Verify the patient’s identity using two identifiers to maintain test integrity. Finally, ensure the meter is calibrated and ready for use by following the on-screen instructions or referring to the manual if needed.

4.2 Conducting a Blood Glucose Test Step-by-Step

To conduct a blood glucose test with the Accu-Chek Inform II, begin by pressing the Power On/Off Button to activate the meter. Insert a test strip into the meter, ensuring it clicks into place. Scan the patient’s barcode or manually enter their ID to maintain accurate records. Perform a fingerstick using a lancet to obtain a blood sample. Gently apply the blood to the designated area on the test strip within the 5-second window. The meter will automatically detect the sample and display the result in 5 seconds. If an error occurs, refer to the troubleshooting guide in the manual. Dispose of used strips and lancets safely after each test.

4.3 Managing Multiple Patient Profiles and Test Results

The Accu-Chek Inform II allows easy management of multiple patient profiles, ensuring accurate and organized tracking of blood glucose results. To assign a patient ID, scan the barcode or manually enter the ID before conducting a test. Test results are automatically stored with timestamps and linked to the respective patient profile. For data management, results can be uploaded to a computer or server via WLAN for further analysis. Regular software updates are recommended to maintain optimal performance and security. Always ensure patient identification is verified before each test to maintain data integrity. This system is designed to streamline workflows in healthcare settings, ensuring efficient patient care and record-keeping.

Maintenance and Troubleshooting

Regularly clean the meter and accessories with a soft cloth and mild detergent. Replace batteries as needed and perform system checks to ensure accuracy. Refer to the manual for troubleshooting common error codes and solutions to maintain optimal performance.

5.1 Cleaning and Caring for the Meter and Accessories

Regular cleaning of the Accu-Chek Inform II meter and accessories is essential for maintaining accuracy and longevity. Use a soft, dry cloth to wipe the meter’s surface, avoiding harsh chemicals or abrasive materials. For more thorough cleaning, dampen the cloth with mild detergent, but ensure no moisture enters the device. Test strips should be stored in their original vial with the lid tightly sealed to prevent exposure to light, humidity, or temperature extremes. Avoid touching the test strip pads, as oils from skin can affect results. Always handle the meter with care to prevent damage. Refer to the manual for detailed cleaning and care instructions.

5.2 Replacing Batteries and Performing System Checks

To replace the batteries in the Accu-Chek Inform II meter, open the battery compartment located at the back. Insert two new 1.5V AAA alkaline batteries, ensuring correct polarity. Close the compartment securely. After replacing, perform a system check to verify functionality. Turn on the meter and follow the on-screen prompts to run a self-test. If using a test strip, insert it to activate the meter and confirm proper operation. Regular system checks ensure accurate results and optimal performance. Refer to the manual for detailed instructions on battery replacement and system verification procedures.

5.3 Common Error Codes and Their Solutions

The Accu-Chek Inform II system displays error codes to identify specific issues. Common errors include “HI,” indicating a blood glucose reading above 600 mg/dL, and “LO,” for readings below 10 mg/dL. These codes prompt immediate attention to the patient’s condition. Other errors like “ER1” or “ER2” may signify system malfunctions, requiring meter restart or replacement. Always refer to the operator manual for detailed solutions. If issues persist, contact Roche Diagnostics support for assistance. Regular system checks and troubleshooting ensure accurate and reliable performance.

Performance Characteristics

The Accu-Chek Inform II system delivers high accuracy and precision, ensuring reliable blood glucose results. It meets international standards for performance, with excellent linearity and repeatability across all glucose levels.

6.1 Accuracy and Precision of the Accu-Chek Inform II

The Accu-Chek Inform II system demonstrates exceptional accuracy and precision, complying with ISO 15197:2013 standards. It ensures reliable results by automatically checking meter, strip, and sample integrity. Advanced technology minimizes errors, providing consistent readings across various glucose levels. The system’s precision is further enhanced by temperature compensation and robust quality control measures. These features ensure that healthcare professionals can trust the results for accurate patient care and decision-making. The Accu-Chek Inform II consistently delivers high performance, making it a reliable choice for blood glucose monitoring in clinical settings.

6.2 Linearity and Repeatability of Test Results

The Accu-Chek Inform II system exhibits excellent linearity across its measurement range, ensuring consistent and accurate results. Repeatability is maintained within tight limits, with minimal variation when testing the same sample under identical conditions. The system adheres to ISO 15197:2013 standards, confirming its reliability. Advanced calibration and built-in quality checks further enhance linearity and repeatability, making it a dependable tool for clinical settings. These performance characteristics ensure that healthcare professionals can rely on the Accu-Chek Inform II for precise and consistent blood glucose monitoring, which is critical for effective diabetes management.

Regulatory and Safety Information

The Accu-Chek Inform II system is FDA-cleared and complies with international standards like ISO 15197:2013. It is intended for in vitro diagnostic use only. Always follow safety guidelines to avoid misuse and ensure accurate results.

7.1 Compliance with International Standards and Certifications

The Accu-Chek Inform II system is fully compliant with international standards, including FDA clearance and ISO 15197:2013 certification, ensuring high accuracy and reliability in blood glucose monitoring. It also holds CE marking, adhering to EU directives, and meets regulatory requirements in countries like Canada and Australia. The system is certified for WLAN connectivity, facilitating seamless data transfer. Designed for in vitro diagnostic use, it is intended for multiple patient use in professional healthcare settings. Compliance with these standards underscores the system’s commitment to safety and performance, making it a trusted choice for diabetes management worldwide, ensuring reliable and consistent results in diverse clinical environments.

7.2 Safety Precautions and Contraindications

Prior to using the Accu-Chek Inform II system, it is essential to follow all safety precautions and understand contraindications to ensure safe and effective operation. Always handle test strips with care, avoiding exposure to extreme temperatures (below 4°C or above 30°C) and humidity levels outside 10-80%, as this may compromise test accuracy. Ensure proper disposal of used lancets and test strips in biohazard containers to prevent infection risks. Importantly, the system is not intended for self-monitoring of blood glucose and should only be used by trained healthcare professionals in controlled environments. Adherence to these guidelines is crucial for the reliability of results and user safety.

Documentation and Support

The Accu-Chek Inform II system provides comprehensive documentation, including user manuals and technical notes, available as PDF downloads. Additional support and troubleshooting guides are accessible online.

8.1 Accessing the User Manual and Technical Notes

The Accu-Chek Inform II user manual and technical notes are available as PDF downloads from the Roche Diagnostics website. Version 8;0 of the manual includes detailed instructions for operation, troubleshooting, and system maintenance. Specific versions, such as 4.3 and 6.0, cater to meters with serial numbers UU14000000 and above. Users can directly access the manual via the URL http://www.accu-chekinformii.com/pdf/05234646001-02_ACI2_OM_Final_030113.pdf. Additionally, the manual is stored on the Base Unit for easy reference. For further assistance, contacting Roche Diagnostics support is recommended.

8.2 Contacting Roche Diagnostics for Assistance

For technical support or inquiries regarding the Accu-Chek Inform II system, users can contact Roche Diagnostics directly. The company provides comprehensive assistance through various channels, including email and phone support. Detailed contact information is available in the operator’s manual and on the official Roche Diagnostics website. Additionally, regional offices and customer service centers offer localized support, ensuring prompt resolution of issues. Users are encouraged to reach out for troubleshooting, software updates, or any operational concerns to maintain optimal system performance.

Best Practices for Use

Regularly update software, store test strips properly, ensure patient identification, and maintain device hygiene to optimize performance and accuracy of the Accu-Chek Inform II system.

9.1 Proper Storage and Handling of Test Strips

Store Accu-Chek Inform II test strips in their original vial with the lid tightly closed to maintain humidity levels between 10-80%. Keep strips at temperatures between 39°F and 86°F (4°C to 30°C). Avoid freezing or exposing strips to direct sunlight or moisture. Do not bend or handle strips roughly, as this may damage the reagent layer. Ensure strips are used before their expiration date, visible on the vial label. Proper storage and handling are critical to ensure accurate test results and prevent strip degradation. Always replace the vial lid securely after removing a strip to maintain integrity.

9.2 Ensuring Patient Identification and Test Integrity

To maintain accurate and reliable test results, proper patient identification is essential. Use barcode scanning or manual entry to ensure each test is linked to the correct patient profile. Always verify the patient’s identity before conducting a test to prevent mix-ups. Ensure the meter is correctly assigned to a patient or location to avoid data confusion. Follow proper testing procedures, such as using the correct puncture technique and applying adequate blood sample size. Regularly review test results and patient records for consistency. Training on the Accu-Chek Inform II system is recommended to ensure all users understand best practices for patient identification and test integrity. Adherence to these protocols ensures accurate and reliable glucose monitoring.

9.3 Regularly Updating Software for Optimal Performance

Regular software updates are crucial for maintaining the Accu-Chek Inform II system’s optimal performance. Updates often include new features, security patches, and performance improvements. To update, connect the meter to a computer via USB or use the WLAN connection. Visit the Roche Diagnostics website or use the provided software utility to check for the latest version. Follow the on-screen instructions to download and install updates. Ensure the meter is properly powered during the update process to avoid interruptions. Regular updates help prevent technical issues, improve data accuracy, and enhance system compatibility. Always refer to the user manual for detailed instructions on updating software safely and effectively.

Categories
Manuals

lincoln auto greaser manual

The Lincoln Auto Greaser Manual provides comprehensive guidance on installation, operation, and maintenance of automatic lubrication systems, ensuring optimal performance and longevity of automotive components through proper grease application.

Overview of the Lincoln Auto Greaser Manual

The Lincoln Auto Greaser Manual is a comprehensive guide detailing the installation, operation, and maintenance of Lincoln’s automatic lubrication systems. It covers essential topics such as system components, safety precautions, and troubleshooting procedures. The manual emphasizes proper lubrication practices to ensure optimal performance and longevity of automotive systems. It also provides technical specifications, warranty information, and FAQs to address common user queries. Designed for both novice and experienced operators, the manual serves as a critical resource for understanding and maintaining Lincoln’s QuickLub and other related systems, ensuring efficient and reliable operation of automotive lubrication equipment.

Importance of Proper Lubrication in Automotive Systems

Proper lubrication is crucial for maintaining automotive systems, preventing wear and tear, and ensuring smooth operation. It reduces friction between moving parts, minimizes heat generation, and prevents premature component failure. Inadequate lubrication can lead to costly repairs, downtime, and safety hazards. Regular lubrication extends equipment lifespan, enhances performance, and maintains fuel efficiency. The Lincoln Auto Greaser Manual underscores the need for consistent and precise grease application to critical components, aligning with best practices in automotive maintenance. By adhering to recommended lubrication schedules, users can safeguard their investments and ensure reliable vehicle operation under various conditions.

Key Features of the Lincoln Auto Greaser System

The Lincoln Auto Greaser System offers advanced features for efficient lubrication, including a central pump with a 2-liter reservoir, ensuring continuous grease supply. It supports both manual and automatic operation, with a remote push-button for easy activation. The system incorporates progressive metering valves, delivering precise lubricant amounts to each component. Compatibility with 12 VDC and 24 VDC motors enhances versatility across various applications. Additionally, the system includes diagnostic capabilities, such as fault codes, to identify issues promptly. These features ensure reliable performance, minimize downtime, and simplify maintenance, making the Lincoln Auto Greaser a robust solution for automotive lubrication needs.

Installation Guidelines

Ensure proper setup by following pre-installation checks, step-by-step mounting, and post-installation testing to guarantee seamless operation of the Lincoln Auto Greaser System.

Pre-Installation Checks and Preparations

Before installing the Lincoln Auto Greaser System, review the manual thoroughly to ensure compatibility with your vehicle or machine. Inspect all components for damage and verify the grease reservoir is filled to the recommended level. Ensure the system’s voltage matches your vehicle’s electrical system (12 VDC or 24 VDC). Clean the area where the system will be mounted to prevent contamination. Gather all necessary tools and hardware, and ensure proper ventilation to avoid inhaling grease fumes. Familiarize yourself with safety guidelines and wear protective gear. Double-check that all electrical connections are secure and meet the manufacturer’s specifications. Proper preparation ensures a smooth installation process.

Step-by-Step Installation Process

Begin by reviewing the manual to confirm compatibility and system requirements. Mount the QuickLub pump securely, ensuring it is level and accessible. Connect the grease reservoir, ensuring it is filled with the recommended grease type. Attach the divider valves to the pump, following the progressive metering configuration. Install the tubing and fittings, routing them to the lubrication points on the vehicle or machine. Connect the electrical wiring to the control unit, ensuring proper voltage (12 VDC or 24 VDC). Activate the system manually using the remote push-button to test functionality. Verify grease flow through all lines and address any blockages. Secure all connections and refer to the manual for specific configurations. Keep the manual handy for future reference.

Post-Installation Checks and Testing

After installation, ensure the system is turned off and the reservoir is filled with the recommended grease. Inspect all connections for tightness and proper routing. Activate the system manually using the remote push-button to test functionality. Verify grease flow through all lines by checking lubrication points or using a grease gun at divider valves. Ensure the pump operates smoothly and the reservoir level is adequate. Test both manual and automatic modes to confirm proper operation. Address any blockages or leaks promptly. Refer to the manual for specific testing procedures and configuration settings. Record the initial system performance for future maintenance reference.

Safety Precautions

Always follow safety guidelines, use original Lincoln parts, and adhere to vehicle manufacturer instructions. Avoid unauthorized modifications to ensure safe and reliable operation of the lubrication system.

General Safety Guidelines for Handling Lubrication Systems

When handling the Lincoln Auto Greaser system, always wear protective gear, including gloves and safety glasses. Ensure the system is turned off and depressurized before performing any maintenance. Avoid over-tightening connections, as this may damage components. Use only Lincoln-approved grease to prevent compatibility issues. Keep the work area clean and well-ventilated to minimize fire hazards. Never modify the system without prior authorization, as this could void the warranty or lead to unsafe conditions. Refer to the manual for specific instructions and adhere to all safety symbols and warnings provided. Proper handling ensures safe and efficient system operation.

Warning Signs and Safety Symbols in the Manual

The Lincoln Auto Greaser manual includes critical warning signs and safety symbols to ensure user safety. Symbols such as a hand in a stop gesture indicate potential hazards, while exclamation marks signal important information. Warning labels on the equipment highlight risks like high pressure or hot surfaces. The manual also uses color coding: red for danger, yellow for caution, and green for safety instructions. These visual cues are essential for understanding and mitigating risks during installation, operation, and maintenance. Always review these symbols before starting any task to prevent accidents and ensure compliance with safety protocols.

Emergency Procedures in Case of System Malfunction

In case of a Lincoln Auto Greaser system malfunction, immediately shut down the system and isolate the power source to prevent further damage or hazards. Refer to the manual for specific shutdown procedures. If the system fails to operate, manually lubricate critical components to avoid equipment damage. Notify supervisors or maintenance personnel promptly. Check for blockages, leaks, or faulty valves, and address them according to the troubleshooting guide. For unresolved issues, contact Auto-Lube Services, Inc., or authorized distributors for technical assistance. Always follow safety protocols to ensure personal and equipment safety during emergency procedures.

System Components

The Lincoln Auto Greaser system includes a central lubrication pump, reservoir, and divider valves, designed to deliver precise grease amounts to critical machine points efficiently.

Overview of the QuickLub Central Lubrication Pump

The QuickLub central lubrication pump is a core component of the Lincoln Auto Greaser system, designed to distribute grease efficiently to critical machine points. It operates with either a 12 VDC or 24 VDC motor, offering flexibility for various applications. The pump is paired with a reservoir, typically holding up to 2 liters of grease, ensuring consistent lubrication. Its design integrates with divider valves to meter precise grease amounts, optimizing system performance. Regular maintenance, such as checking grease levels and ensuring proper function, is essential to prolong equipment life and prevent operational issues. Adhering to the manual ensures optimal pump operation.

Understanding the Reservoir and Grease Capacity

The reservoir in the Lincoln Auto Greaser system stores the grease, with capacities varying up to 2 liters depending on the model. Proper reservoir management is crucial for consistent lubrication. The manual recommends using only approved grease types to ensure compatibility and system performance. Regular checks of the reservoir level are essential to prevent depletion, which can lead to equipment damage. The reservoir’s design allows for easy refilling and monitoring, ensuring uninterrupted operation. Always refer to the manual for specific guidelines on reservoir maintenance and grease replacement to maintain optimal system functionality and extend equipment lifespan. Proper handling ensures reliable performance.

Role of Divider Valves in Progressive Metering

Divider valves play a crucial role in the Lincoln Auto Greaser system by ensuring precise and proportional distribution of grease to multiple lubrication points. These valves operate sequentially, delivering measured amounts of grease to each component in a predefined order. This progressive metering ensures that no point is over- or under-lubricated, maintaining optimal performance and preventing equipment damage. The valves are designed to handle varying system pressures and grease volumes, making them adaptable to different automotive applications. Regular maintenance of divider valves is essential to ensure accurate grease distribution and overall system efficiency. Proper functioning of these valves is key to maximizing equipment lifespan.

Operating Instructions

The Lincoln Auto Greaser operates in manual or automatic modes, allowing users to control grease distribution. Use the remote push-button for manual activation or set automatic cycles for convenience.

Starting and Stopping the Lubrication System

To start the Lincoln Auto Greaser, ensure the reservoir is filled with the recommended grease and all connections are secure. Press and hold the remote push-button or the manual override button on the pump. The system will begin distributing grease through the divider valves. For automatic mode, set the timer or enable continuous operation as needed. To stop, disconnect power or press the stop button. In manual mode, release the push-button to halt operation. Always refer to the manual for specific startup and shutdown sequences to ensure system longevity and prevent damage.

Manual vs. Automatic Lubrication Modes

The Lincoln Auto Greaser offers two operation modes: manual and automatic. In manual mode, the system activates via the remote push-button or manual override, delivering grease on demand. This is ideal for maintenance or emergency lubrication. Automatic mode runs based on pre-set timers or external signals, ensuring continuous, hands-free operation. Users can switch between modes using the control panel or system settings. Manual mode is suitable for quick, targeted applications, while automatic mode is designed for long-term, unattended operation. Always follow the manual guidelines for mode selection to ensure optimal performance and system longevity.

Using the Remote Push-Button for Manual Lube Activation

The remote push-button provides a convenient way to manually activate the Lincoln Auto Greaser system. Locate the button, typically installed in the vehicle’s cab, and press and hold it to initiate a manual lube cycle. The system will deliver grease to all connected components for a pre-set duration, ensuring targeted lubrication. Release the button to stop the cycle. For systems with adjustable settings, consult the manual to customize the activation time. Always ensure the push-button is securely connected and functioning properly to avoid malfunctions. Follow safety guidelines when using manual mode to prevent over-lubrication or system strain.

Maintenance and Repair

Regular maintenance ensures optimal performance, including checking reservoir levels and greasing bearings every 500 hours. Use only original Lincoln parts for replacements to maintain system integrity and functionality.

Regular Maintenance Schedule for Optimal Performance

Adhere to a structured maintenance routine to ensure the Lincoln Auto Greaser operates efficiently. Check grease levels every 50 operating hours and top up as needed. Inspect grease lines and divider valves every 100 hours for blockages or wear. Replace the system filters every 500 hours to maintain proper flow. Grease bearings manually every 500 hours using the grease fitting on divider valves. Flush the system annually to remove contaminants. Always use original Lincoln parts for replacements to guarantee compatibility and performance. Regular maintenance prevents downtime and extends system lifespan, ensuring consistent lubrication delivery to critical components.

Replacing Grease and Checking Reservoir Levels

Regularly replacing grease and monitoring reservoir levels is crucial for maintaining the Lincoln Auto Greaser’s functionality. To replace grease, ensure the system is turned off and cool. Remove the reservoir cap and pour in the recommended grease type. Fill to the maximum level indicated on the reservoir gauge. Check levels weekly, especially during high-usage periods. If the reservoir is low, refill immediately to prevent system malfunction. Use only Lincoln-approved grease for optimal performance. Clean the reservoir and surrounding area before refilling to avoid contamination. Proper grease management ensures consistent lubrication delivery and prolongs system reliability. Always refer to the manual for specific guidelines.

Troubleshooting Common Issues and Fault Codes

Identify common issues by reviewing fault codes displayed on the control panel. Blocked grease lines or faulty pumps often trigger system malfunctions. Check for pressure relief issues or low grease levels, which can disrupt lubrication flow. Manually cycle the pump to clear blockages or reset the system. Consult the manual for specific fault code meanings, as flashing frequencies correlate to particular issues. Address leaks or worn components promptly to prevent further damage. Use Lincoln-approved parts for replacements to ensure compatibility and system performance. Regular maintenance and inspections can help prevent recurring issues and extend the lifespan of the Auto Greaser system.

Troubleshooting Common Issues

Identify common issues like blocked grease lines or faulty pumps. Address low grease levels or pressure relief problems promptly. Manually cycle the pump to clear blockages or reset the system. Check reservoir levels and ensure proper grease flow. Consult the manual for fault codes and solutions. Replace worn components with Lincoln-approved parts to maintain system efficiency and prevent recurring malfunctions.

Identifying and Resolving Blocked Grease Lines

Blocked grease lines can disrupt the lubrication system’s efficiency. To identify blockages, manually cycle the pump or check for low grease flow. Inspect grease fittings and lines for obstructions. Use a grease gun to apply pressure and clear blockages. If issues persist, disassemble and clean affected lines. Ensure all connections are secure to prevent leaks. Regular maintenance, such as checking reservoir levels and replacing worn components, helps prevent blockages. Always use genuine Lincoln parts for repairs to maintain system performance and longevity. Addressing blocked lines promptly ensures smooth operation and prevents damage to critical automotive components.

Diagnosing Faulty Pump or Motor Issues

Faulty pumps or motors in the Lincoln Auto Greaser system can cause lubrication failure. Check for unusual noises, low pressure, or inconsistent grease flow. Inspect the motor for signs of wear or overheating. Verify electrical connections and ensure proper voltage supply. If the pump fails to activate, consult the manual for fault codes and flashing frequencies, which indicate specific issues. Perform manual cycling of the pump to test functionality. Replace faulty components with genuine Lincoln parts to maintain system reliability and performance. Regular maintenance, such as checking motor bearings and pump seals, helps prevent failures and ensures optimal system operation.

Addressing Leaks or Pressure Relief Problems

Leaks or pressure relief issues in the Lincoln Auto Greaser system can lead to inefficient lubrication. Inspect hoses and connections for signs of wear or damage. Tighten loose fittings and replace worn seals or gaskets. If grease is escaping from pressure relief valves, check for blockages in the system. Manually cycle the valves to identify and clear obstructions. Ensure all components are properly aligned and functioning. Use only genuine Lincoln spare parts for replacements. Regularly inspect the system to prevent future leaks and maintain optimal pressure. Addressing these issues promptly ensures reliable operation and extends the lifespan of the lubrication system.

Technical Specifications

The Lincoln Auto Greaser features motor options of 12 VDC or 24 VDC, a 2-liter grease reservoir, and compatibility with various lubrication systems, ensuring precise metering and reliable operation.

Motor Options: 12 VDC vs. 24 VDC

The Lincoln Auto Greaser offers two motor options: 12 VDC and 24 VDC, catering to different vehicle and equipment requirements. The 12 VDC motor is ideal for standard automotive applications, while the 24 VDC motor suits heavier-duty industrial or commercial systems. Both options deliver consistent power and reliable performance, ensuring efficient grease distribution. The choice between the two depends on the specific voltage requirements of the machinery, making the system adaptable to various operating environments. This flexibility ensures optimal functionality across a wide range of applications, from light-duty vehicles to industrial machinery.

Grease Capacity and Reservoir Sizes

The Lincoln Auto Greaser system offers various reservoir sizes to accommodate different lubrication needs. The reservoir capacities range from 2 liters to over 2 gallons, ensuring sufficient grease supply for both light-duty and industrial applications. For instance, the QUICKLUB 203 model features a 2-liter reservoir, while larger systems may hold up to 4 or 8 liters of grease. These options allow users to choose the right capacity for their machinery, optimizing performance and reducing downtime. Proper reservoir sizing is crucial for maintaining consistent grease flow and extending the lifespan of the lubrication system.

Compatibility with Various Lubrication Systems

The Lincoln Auto Greaser system is designed to integrate seamlessly with a wide range of lubrication systems, including Groeneveld, Bekamax, Interlube, and Graco. Its progressive metering technology ensures compatibility with both grease and oil-based systems, making it versatile for diverse automotive and industrial applications. The QUICKLUB 203 and QLS 401 models, for example, are compatible with external manual lubrication nipples and proximity switches, enhancing flexibility. Additionally, the system supports 12 VDC and 24 VDC motor options, catering to different power requirements. This adaptability ensures that the Lincoln Auto Greaser can be tailored to meet the specific needs of various machinery and equipment.

Warranty and Liability Information

The Lincoln Auto Greaser system is warranted to be free from defects in material and workmanship. Liability is limited to repair or replacement of faulty goods.

Warranty Terms for Lincoln Auto Greaser Systems

Lincoln Auto Greaser systems are covered under a limited warranty, ensuring protection against defects in materials and workmanship for a specified period from the date of purchase. The warranty guarantees repair or replacement of faulty components at no additional cost, provided the system is used as intended and maintained according to the manual. Original Lincoln spare parts must be used to maintain warranty validity. Any claims under the warranty must be submitted in writing, with proof of purchase and detailed documentation of the issue. Misuse or improper installation may void the warranty. Full terms and conditions are outlined in the manual.

Liability Disclaimers and Exclusions

All materials in the Lincoln Auto Greaser Manual are proprietary to SKF/Lincoln and Auto-Lube Services, Inc., with strict prohibitions on unauthorized distribution or modification. Liability is excluded for damages arising from improper use, misuse, or third-party alterations. The warranty does not cover failures due to non-compliance with installation or maintenance instructions. Use of non-original Lincoln parts voids both warranty and liability coverage. Users assume all operational risks, with the manufacturer disclaiming liability for indirect or consequential damages. Adherence to safety guidelines and proper maintenance practices is solely the responsibility of the user. Full liability exclusions are detailed in the manual.

General Terms of Payment and Delivery

Payment terms for Lincoln Auto Greaser systems and components are outlined in the General Terms of Payment and Delivery, emphasizing adherence to agreed schedules and methods. Delivery conditions ensure timely and secure shipment of products, with specific requirements for handling and transportation. Customers must use original Lincoln parts to maintain warranty validity. Payments are typically processed through authorized distributors, with detailed invoices provided for transparency. Delivery timelines vary based on location and product availability. For custom orders or bulk purchases, specialized agreements may apply, requiring direct coordination with Auto-Lube Services or SKF/Lincoln representatives. Proper documentation and approval processes are mandatory for all transactions.

FAQs and Common Queries

Frequently asked questions address installation challenges, system performance issues, and maintenance tips for the Lincoln Auto Greaser, ensuring users find quick and reliable solutions.

Frequently Asked Questions About Installation

What are the key steps for installing the Lincoln Auto Greaser? Ensure proper mounting, connect the reservoir, and wire the system according to the manual. Test the pump after installation.

Can I use non-Lincoln parts? No, only original Lincoln parts are recommended to maintain system performance and warranty validity.

How do I prepare the system before use? Fill the reservoir with recommended grease, prime the lines, and cycle the pump manually to ensure proper flow.

What if the pump doesn’t start? Check power connections, ensure the reservoir isn’t empty, and verify wiring matches the motor voltage (12V or 24V DC).

Where can I find detailed installation diagrams? Refer to the manual or contact Lincoln’s technical support for assistance.

How long does installation typically take? It varies by system size but generally takes 2-4 hours with proper preparation.

Can I install the system myself? Yes, but follow the manual closely and ensure all safety precautions are observed. If unsure, consult a professional.

What if I notice leaks after installation? Inspect connections, tighten fittings, and ensure all components are compatible with the system.

How do I test the system post-installation? Run a manual cycle, check grease flow at bearings, and verify pressure settings match recommendations.

Where can I find troubleshooting guides? The manual includes a troubleshooting section, or contact Lincoln’s support team for assistance.

What if the reservoir size is insufficient? Choose a model with a larger reservoir or upgrade as needed to meet your application requirements.

Can I install the system on any vehicle? Ensure compatibility with your vehicle’s specifications and consult the manual for specific requirements.

How do I ensure proper grease flow? Use the recommended grease type, check line connections, and cycle the system regularly.

What if the pump is noisy? Check for blockages, ensure proper grease levels, and verify the pump is not overworked.

Can I automate the lubrication process? Yes, set the system to automatic mode or use the remote push-button for manual activation as needed.

How do I reset the system after a power outage? Turn the power off, wait 30 seconds, then restart and run a manual cycle to ensure proper function.

What if the system doesn’t prime? Check for airlocks, ensure the reservoir is full, and manually cycle the pump to clear any blockages.

Can I upgrade the system later? Yes, Lincoln offers upgrade kits and additional components to expand or modify the system as needed.

How do I ensure the system is properly grounded? Follow the manual’s wiring instructions and verify all connections are secure and corrosion-free.

What if the system overheats? Check for overuse, ensure proper ventilation, and verify the motor is rated for your application.

Can I use the system in extreme temperatures? Yes, but ensure the grease used is suitable for the temperature range and follow the manual’s recommendations.

How do I know if the system is working correctly? Monitor grease flow, check for leaks, and ensure the pump operates smoothly during cycles.

What if the system’s pressure is too low? Check the reservoir level, ensure lines are clear, and verify the pump’s pressure settings match recommendations;

Can I install the system on multiple vehicles? Yes, but ensure each installation follows the manual’s guidelines and is tailored to the specific vehicle’s needs.

How do I prevent contamination? Keep the reservoir sealed, use clean grease, and avoid exposing the system to dirt or moisture.

What if the system’s reservoir is damaged? Replace it immediately with a genuine Lincoln part and ensure proper installation to prevent further issues.

Can I modify the system for custom applications? Yes, but consult Lincoln’s technical support to ensure modifications are compatible and safe.

How do I ensure the system’s longevity? Follow the maintenance schedule, use recommended parts, and address any issues promptly.

What if the system’s motor fails? Check the power supply, ensure proper wiring, and replace the motor with a genuine Lincoln part if necessary.

Can I integrate the system with other lubrication systems? Yes, but ensure compatibility and follow the manual’s integration guidelines or consult a professional.

How do I troubleshoot error codes? Refer to the manual’s troubleshooting section or contact Lincoln’s support team for assistance.

What if the system’s reservoir is not filling properly? Check the grease source, ensure the pump is functioning, and verify the reservoir’s inlet is not blocked.

Can I use the system in hazardous environments? Yes, but ensure the system is rated for such conditions and follow all safety precautions outlined in the manual.

How do I ensure the system’s proper alignment? Follow the manual’s mounting instructions and ensure the system is level and securely fastened.

What if the system’s grease lines are clogged? Use the manual’s troubleshooting guide to identify and clear blockages, ensuring proper flow.

Can I install the system in tight spaces? Yes, but ensure proper clearance for components and follow the manual’s space requirements.

How do I ensure the system’s quiet operation? Mount it securely, ensure proper grease flow, and check for loose connections that may cause noise.

What if the system’s remote control doesn’t work? Check the wiring, ensure the battery is charged (if applicable), and verify the receiver is functioning correctly.

Can I install the system on older vehicles? Yes, but ensure compatibility with the vehicle’s specifications and consult the manual for any special considerations.

How do I ensure the system’s proper sealing? Use genuine Lincoln gaskets and seals, and tighten all connections as specified in the manual.

What if the system’s pump is slow? Check for blockages, ensure the reservoir is full, and verify the pump’s settings match the application’s needs.

Can I install the system myself without tools? No, basic tools are required; ensure you have everything needed before starting the installation.

How do I ensure the system’s proper ventilation? Install it in a well-ventilated area and ensure no obstructions block airflow around the motor and reservoir.

What if the system’s grease is too thick? Use a higher viscosity grease suitable for the temperature range and ensure the pump is rated for the selected grease.

Can I install the system on boats or marine vehicles? Yes, but ensure the system is marine-rated and follow the manual’s specific guidelines for such applications.

How do I ensure the system’s proper grounding? Follow the manual’s wiring instructions and verify all connections are secure and free from corrosion.

What if the system’s pump overheats? Check for overuse, ensure proper ventilation, and verify the motor is rated for your application.

Can I install the system in high-vibration environments? Yes, but ensure the system is securely mounted and all connections are tightened to prevent loosening.

How do I ensure the system’s proper pressure? Adjust the pump’s pressure settings as recommended in the manual and ensure the reservoir

Common Concerns About System Performance

Users often inquire about inconsistent grease flow, which can be due to blocked lines or incorrect grease viscosity. Ensuring proper line priming and using recommended grease types resolves this. Another concern is pump noise, typically caused by air in the system or misalignment. Cycling the pump manually and checking connections usually fixes this. Leaks around fittings are also common, often due to loose connections or damaged seals. Tightening fittings and replacing seals as needed addresses this. Additionally, some users report low system pressure, which can result from a low reservoir level or clogged filters. Refilling grease and cleaning filters resolves this issue.

Queries Regarding Maintenance and Repair

Common queries include how to replace grease and check reservoir levels, ensuring optimal system performance. Users also ask about troubleshooting techniques for blocked grease lines or faulty pumps. Regular maintenance, such as cleaning filters and checking connections, is advised to prevent issues. Replacing worn-out components like seals or divider valves is another frequent inquiry. Cycling the system manually after maintenance helps verify proper function. Additionally, users often seek guidance on resetting error codes or interpreting diagnostic signals from the control unit. Proper record-keeping of maintenance activities is recommended to track system health and plan future service intervals effectively.